It is Fall 2012, there is a nip in the air, the leaves are changing color, and I’m getting ready for a slow fiber festival in Penticton, BC. Last year this show caught me by surprise, and I hurriedly threw everything together. I wound up forgetting bags to put the purchases in and business brochures as well. The show itself went well, but I would have done better mentally if I had been better prepared. This year I am ready and organized. It is what happens before and after the show that prepares you for success during the craft show.
There are 6 steps to help you get ready for your next craft show. Following these steps will improve your monetary and psychological results for not only your next show but also the one after that, as well.
Step 1 – Planning
After doing shows for over a decade, I’ve learned to go through a show checklist, before heading out. It helps me to focus on the craft show and to make sure I don’t forget anything. Here are four key areas to help you plan.
Products
Determine which of your products you would like to take to the show. Read the show’s guidelines well in advance of your show. Some shows are limited to items that you or your household have made, therefore there is no reselling of product allowed.
Is this a craft show that is attracting high-end consumers or are lower priced items more likely to sell? What are the customers shopping for? Are they looking for Christmas gifts or things to take to the beach? Try to match your product to the expected audience. These questions clarify which of your products would do better at the show. Usually, you can’t take all of your products with you, so you need to focus on an appropriate selection.
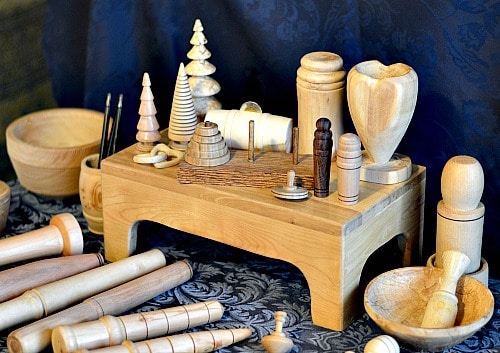
Answering the question “What will sell?” is too big of a topic for this post. But the answers might intrigue you.
Display Fixtures
What display fixtures do you want to use? This corresponds to how long do you have to set up your display. Some shows just let you in early on the day of the sale while others will let you do some set up the day before. You may want to do a dry run of your booth ahead of time, at home. This will let you know if there will be problems setting up your display fixtures and tables etc.
Mark out the floor space according to what has been allocated to you and try various arrangements to best present your products. Make sure you understand which dimension is your frontage and which is your depth. At a recent fair, a vendor thought they were getting 20’ frontage and 10’ depth but it was the other way around. A narrow deep space is a greater challenge for attracting customers than a wide shallow booth.
Show parameters
Evaluate the craft show in terms of the demands it makes on you.
- How many days is the show running?
- Are you able to go home at night?
- How many hours a day are you open for business?
- How many helpers can go to the fair to sell your products?
- If you are doing a one-person show, do the organizers provide help to watch your booth?
- What food services will be available at the show?
- Do you have any personal food allergies that may make commercial food unacceptable to you?
- What will you do to get adequate food and water while you are at the show?
These issues affect your personal health and attitude both during the show and afterward. Plan on taking some healthy snacks and lots of water. Don’t forget to take care of your own needs, while you are serving your customers. No one else will do it for you.
Selling Options
How are your customers going to purchase your products? Are you a cash and cheques only vendor or are credit and debit cards an option? Consider your options carefully as accepting Credit cards can help with more high-end sales.
How will you handle foreign currencies? At one fair in Canada, I met a vendor that insisted on all sales being in US dollars. I didn’t see that booth doing a booming business. The vendor alienated her audience.

Take the time to consider how you will store and manage your cash while at the event. Taking care of cash is easy but sometimes forgotten. Here are 5 tips on managing your cash box. Always pack your cash in the same place. Then you will know where it is!
Step 2 – Packing for the Craft Show
How are you getting your stuff to the show? A large truck with a trailer makes it easy to pack everything in but costs more in gas. A small car, like the Honda Fit that I’ve got, can handle a lot if it is put in carefully but does take good planning to fit everything in. Some vendors send their product on ahead by courier, use the tables provided at the show, and just travel with their luggage. You need to plan and be prepared.
Consider how your product should be packaged. Breakable items need extra care. Be careful not to make your boxes of products too heavy to handle. Better to make a few more trips from the vehicle to the booth than strain your back at the start. Can you buy a light dolly to move your boxes with? Some of these are folding but still take up room in your vehicle, so account for that in your planning.

How easy is it to get the product out and on display? How will you transport your display fixtures? For me, these were often the last things packed and sometimes not too carefully! I had a few surprises when I went to set up my display, with broken shelving, all because I didn’t pack more carefully. Don’t make my mistake. Take extra care at home.
You should use extra lighting in your booth to improve the visibility of your product. Make sure you have extra light bulbs and extension cords. Remember to request power on the show application if you are using lights.
Put all of your administration, promotional material, post-consumer bags or boxes, and signage in one box. Keep it all in one place and you know where to look for it. This is especially true for licenses and governmental authorization for food products etc. Bring along an odds and ends box with tape, stapler, tools, string, elastics, clips, and anything else you think you might need. You never know what is going to happen and you are often isolated and not able to skip out to a local store to get something to solve a problem. It is amazing how creative you can be in a pinch.
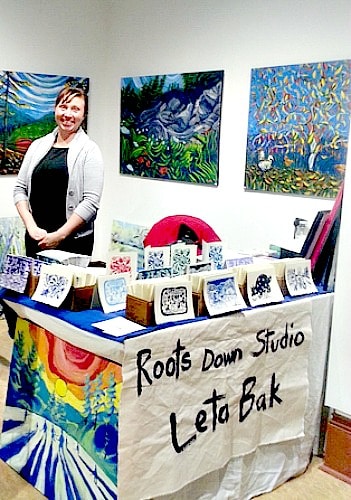
Make sure you have a large sign with your business name on it, that can be seen from across the hall. It’s worth the extra time and expense to make this sign your best work. It needs to be lightweight so that it can be hung up at the back of your booth or prominently displayed. It will catch people’s eye from across the room and draw them into your booth. Make a good impression.
Don’t forget to pack your suitcase. If you might have weather delays in getting home from the show pack extra clothing. Include items that are necessary for medical or dietary reasons. Again you are not going to have a lot of free time to replace anything that you forgot to bring. Don’t forget your toothbrush and breath mints.
Step 3 – Setting up the Booth
Be flexible and adjust to the circumstances that you encounter. There is always something that just doesn’t go quite right at each show. You might need to be creative in your thinking to overcome some obstacles.
Consider the flow of your customers as they encounter your vendor space. Are you utilizing tables or do you have a walk-in area? Which way will the traffic flow around you? You might need to make adjustments as you experience each show and location. At one show I thought that I had a great setup until I realized that my booth became a freeway to get to the coffee. Slightly smaller openings made it look less attractive for walk-throughs.
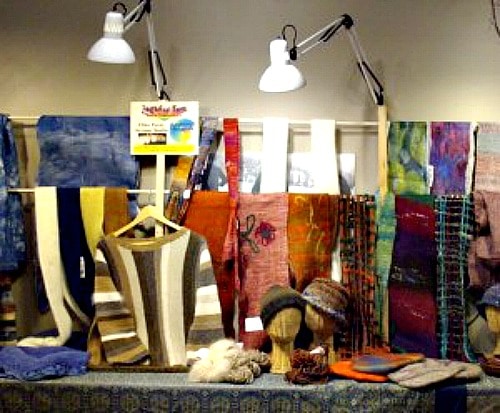
Do be considerate of other vendors while you are setting up. Try to keep your stuff, product, and display fixtures, within your own space. Consider the order of setting up your display. Do you put up large display walls or set things up on tables and shelves? Remember to bring table cloths for your tables, drop sheets behind bigger display walls, and light fixtures to highlight your products. Identify where you will settle with your clients and place bags, cash, receipts, and promotional material there.
Step 4 – Vending during the Craft Show
You need to remember your own personal comfort. Wear shoes and clothing that you can live in for the duration of the show. Drink plenty of water and limit coffee, which can make you anxious and promote dehydration. Dehydration is terrible especially if you are sick and in a strange town. Consider how to handle bathroom and food breaks. You might have family or friends come into man your booth or you might be able to have a floater from the organization watch your booth, as you duck out for a minute or two. Eat regularly and as normally as possible.
Be considerate and develop relationships with the other vendors and the organizers of the show. One vendor I know invests in relationships by purchasing from other vendors at the show. Seriously, working with the vendors creates a much better attitude than treating everyone as competition. If you know where a product is available for a customer, and you don’t have it, then refer them to another vendor who does. At some shows, name tags are required. Be creative with your name tag and let it tell your customers something about your craft, as well as your name. Once you have one that you like, you’ll use it at every show, so invest a bit of time to make it special.
Remember to talk to your customers. For long shows where sales seem slow try this technique. Put ten or so pennies in your pocket. For each customer, you talk to move a penny from one side to the other. When I have done this I usually focus more on talking to the customer and I rarely reach ten pennies before I make another sale.
I have found that I have to work when I am selling at a craft show. There are lots of ways to improve your sales and a few mistakes that can cost you sales. Are you making any of these 7 common mistakes at your craft shows?
Stay to the end of the fair, so don’t pack up early. The show has advertised specific times and you’ve agreed to be there for that time. It shows integrity on your part and respect to the show organizers.
Step 5 – Packing Up
This is usually done in the reverse order of your set up. Package your product first, then your light fixtures, then the rest of your display. Be careful not to lose your cash. I usually keep a table of low priced items out just in case I catch another vendor’s eye as they are walking past the booth.
Remember to pack fragile products and fixtures carefully and in a manner that assists you if you are doing multiple shows. While you are anxious to leave and the organizers would like you out as well, take your time so that nothing is lost or broken. I have quickly packed product then panicked when I got home because I could not find it. Product goes with product, not the administrative box. Always know where your cash box or cash apron is. Don’t pack it with the product. (Don’t ask. I’m not telling the story behind that one. Just trust me.)
Keep your suitcase handy just in case you need it.
Step 6 – Debrief
This is the cleanup stage and is often overlooked. This step completes one craft show and prepares you for the next. When you get home from a show you are tired and there might be problems at home, that distract you from completing this step.
Wash dirty laundry such as table cloths, backdrop curtains, and other display items used in the show. Fix any display items that broke or need adjustment. Obviously, repair or replace damaged products. Unpack anything that needs to air out or dry.
However, a debrief will make the other steps go much easier next time. So brew up your favorite beverage and take some time to review. You can use this checklist to help you evaluate your craft show.
Tally your sales and evaluate how you did. Were you better than last year or worse? What items sold and which didn’t? Deposit money and cheques in the bank and complete credit card transactions. Organize any custom orders that you received. Make a list of products that need to be replaced for the next show.
Take the time now to consider what worked and what did not work. Was it related to the show, time of year, or just something you’d rather do differently next time? Did you see something that another vendor did that might work for you? Can you improve your organization, presentation, or preparation?
This is also the time to review how you did during the show. Were you anxious about making sales? Could you focus better on your customers? Were financial issues challenging you? I have found that my mindset on money really affects my ability to relate well with my customers and make sales. During the debrief is the time to evaluate how the show went, how you managed during the show, and whether this is a show that you would like to do again.
I hope these tips have helped make your shows more enjoyable and that you will look forward to getting back into the shop to make more products for the next craft show!
Turning For Profit
If you have any questions about turning or the business of turning, please leave me a comment at the bottom of the page.
These posts are for you, the woodturner. If you like turning projects or articles related to the business of turning then please sign up for the Turning For Profit newsletter. Generally, it comes out once a week and has links to the current articles, a bit on what I am up to, and usually a question for your response. You can sign up on the right sidebar or just a little lower on the page.
I love woodturning and sharing with you. You can follow me on Facebook as well. Thank you for letting me join you on your woodturning journey. Have fun and remember to turn safely.









Really appreciate your generosity in sharing know-how. I enjoy your articles!