A fidget roller, flip toy, or fidget stick is an easy turning project. A set of two allows two people to fidget at the same time or you can do tricks as well. While there are a lot of embellishments that can be done, a plain wooden fidget stick still works to relieve tension.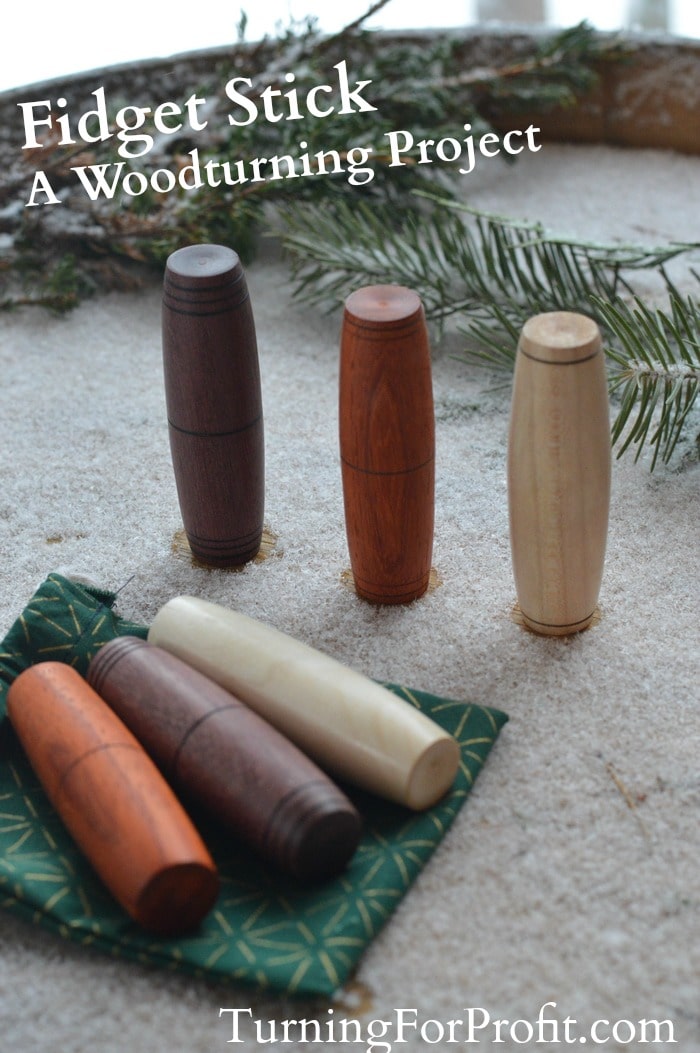
Design Considerations
The shape of the fidget stick is the crucial part of the project. This one is 90 mm long. It is 27mm at the mid-point and 20mm at the ends. I’m glad my digital calipers give both inches and mm! You want a nice progressive curve towards the ends from the middle. Once it is finished it will spin very nicely in a horizontal position as well as doing flips. When standing vertical a light push will cause the fidget stick to flip down and then up again. Gentle touches work better.
Your turning blank needs to be about 1 1/4″ square and about 4″ in length. The finished dimensions are 90mm in length and 27mm in the largest diameter. So this is just over 3 1/2″ and just over an inch round. The wood that I used ranged from light (Black Birch) to heavy (Purple Heart) but the action (flipping) was still okay for all of them.
Turning a Fidget Stick
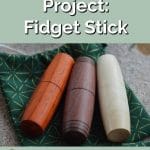
Put the turning blank on the lathe. For this turning project, I used Black Birch, Padauk, and Purple Heart. Turn the blank round with your spindle roughing gouge.
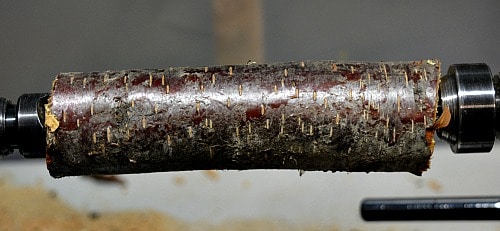
Mark out 90mm with two parting cuts. Then reduce the diameter closer to the desired diameter.
Three Parting Cuts
The first cut is at the center of the fidget stick. This is 45mm from each end. Use a parting tool and calipers to measure down to almost 27mm in the middle of the stick. Two more parting cuts are needed. These are at the ends of the fidget stick and should be 20mm. Just to be clear the parting cuts at the two ends of the stick are 90mm apart. 
Put a pencil mark on all the parting cuts.
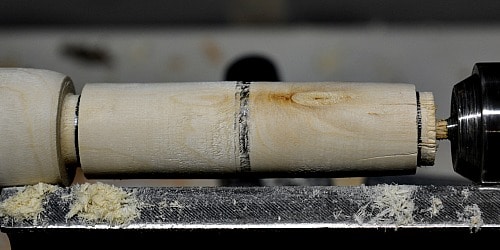
Gradually turn the diameter down to 27mm for the whole fidget stick. Don’t completely remove the pencil mark in the middle. Then use a skew chisel to make a nice sloping curve from the center to the ends. Try to make them symmetrical. Mine is close but not perfect!
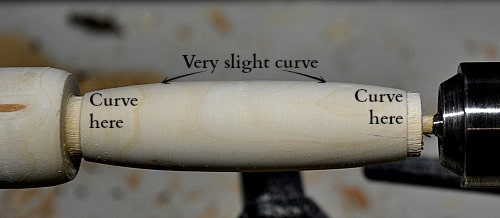
The curve for the fidget stick is important for its action. You want the stick to be flatter at the middle with most of the curve coming just before the ends. If you change the slope too quickly the stick will lose momentum and won’t finish the flip.
Sanding and Decoration
Use the tip of your skew chisel to make small grooves on the fidget stick. Then take a piece of thin wire and make a burn line on your stick. The decorations are up to you. Have fun.
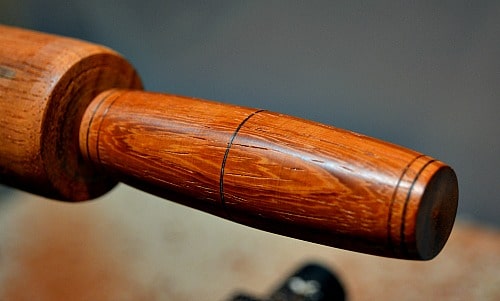
Now to sand your stick. I started with 220 grit sandpaper and worked my way progressively up to 800 grit. Don’t be too aggressive with the 220 grit or you might remove your burn lines! Remember to wipe the stick with a soft cloth after each size of sandpaper.
I used carnauba wax or wood polish to finish off the fidget sticks.
Parting off the lathe
To part the stick from the lathe use a parting tool at a slight angle. At the headstock, point the tool towards the tailstock. Do the opposite when parting off by the tailstock. This will give you a slightly concave shape to the ends of your stick. Work your way in on both ends so that when you’ve finished the parting you will have smaller nibs to remove. Remove the nib in the middle with a sharp knife or carving gouge, sand and finish. You’re done.
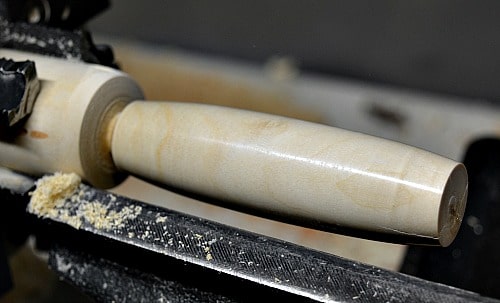
If you have a multi-jawed chuck, like in my pictures, then you can part the stick at the tailstock end first and sand the end while on the lathe. Then you only have to part off the end near the headstock.
Trouble Shooting
If the end of your fidget stick is flat or convex (bulges out) then you will have a challenge getting your stick to stand up vertical. In that case, take a coarse grit of sandpaper (220 grit or smaller grit) and place it on a flat surface. Hold the stick vertical, and sand the end on the sandpaper. Do this until the end is perfectly flat and your stick stands up vertically without being wobbly. Remember to complete the sanding and finishing on that end as well.
Remember that the dimensions are guidelines. That is, work at getting close to these dimensions. However, if you happen to go below the 27mm or 20mm diameters your fidget stick will still work. It is the general shape of the stick and the curve you put on it that will have the biggest impact.
Playing with your fidget stick
To use the stick stand it vertical on a hard surface. Gently knock it down and it should flip a couple of times before it stops. It takes a bit of practice to get the stick to flip consistently. You can also spin it horizontally. Turn a few more if you want to try more complicated tricks.
Embellishments
You can add a cushion of foam on each end. This will make the stick quieter to use. Make the foam circle the same diameter as the end of your fidget stick. Add a slight amount of glue and fix the foam in place.
You can also weigh the ends of your stick. To do this mount your turning blank on your lathe using a multi-jawed chuck. Then take some threaded rod and drill a hole through your stick that is just smaller than the diameter of the rod. (You do this by mounting the drill bit in a collet chuck that fits into your tailstock. Advance the tailstock and drill towards the headstock while the lathe is turned on. I also used this technique when making needle cases.) Use a hack saw to cut two lengths of the threaded rod about 1cm in length. You might need to do some grinding to make them the same size. You want them the same weight to keep the stick in balance. Use a vise to hold the pieces and a hacksaw to cut a slot in the rod. Then you can use a flat blade screwdriver to screw the rod into your stick. I would then add the foam on the ends to complete the weighted stick and to hide the weights.
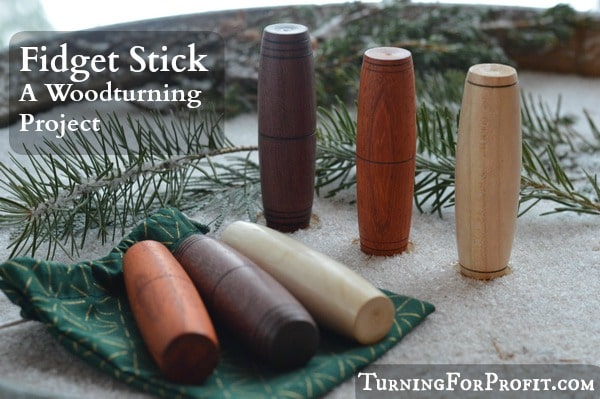
Have some fun and see what size you like and whether you need the weights or not.
The plain wooden fidget stick works just fine but is a bit noisy. The only drawback that I can see is that you need a clean desk to play with them on.
Turning For Profit
If you have any questions about turning or the business of turning, please leave me a comment at the bottom of the page.
These posts are for you, the woodturner. If you like these turning projects or articles related to the business of turning then please sign up for the Turning For Profit newsletter. Generally, it comes out once a week and has links to the current articles, a bit on what I am up to, and usually a question for your response. You can sign up on the right sidebar or just a little lower on the page.
I love woodturning and sharing with you. You can follow me on Facebook as well. Thank you for letting me join you on this woodturning journey. Have fun and remember to turn safely.






Your fidget stick may be a project I could use in teaching the blind how to turn in Toronto, Canada.If you have any ideas on simplifying this project or adapting it for blind turners,please let me know.
If you have any other projects for blind turners, likewise please email or call me at 416-223-4445.
Allan Cooper
Thank you, Allan,for your comment.
Probably the easiest assist would be to make heavy cardboard or plywood templates for the length, diameter at the ends, and diameter at the middle. Getting the shape from the middle to the ends would be more of a feel. You could make a template for the shape but using it would require visually assessing where the template didn’t fit. However for the diameters the template would slide onto the turning and that would indicate the right size to the turner.
Hope this helps!
If the end of your fidget stick is flat or concave (bulges out) then ….
I think you meant “convex”? Concave ‘bulges IN…’ 🙂
Your advice pages are great, by the way!
Thank you for the second set of eyes. Under trouble shooting I had the wrong word. You don’t want your fidget stick to bulge out. The post has now been changed thanks to your feedback!