A yarn bowl keeps a ball of yarn from rolling all over the floor. You take a regular turned bowl and add a curved slot for the yarn to go through. Slide the yarn into the slot so that the ball of yarn can roll about in the bowl without jumping onto the floor. Design your curve to look right with your bowl and so that the yarn is unlikely to pop straight up and out of the slot.
If you haven’t turned a bowl before you should start with a simple bowl. This will give you practice using your bowl gouge to shape the outside and to hollow the inside. A tea light bowl is a slight modification on a bowl shape. Finally a ring holder is a small bowl with a post in the center to hold rings with other jewelry placed in the bowl. A yarn bowl will be larger than these bowls and you want to achieve a good finish on both the outside and the inside so the yarn doesn’t catch.
Make the bowl large enough for most balls of yarn (not skeins) to freely move around. Bring the lip of the bowl in a bit to direct the ball of yarn back into the bowl. Standard skeins of wool from a wool shop come in uniform sizes and would be easy to use in a medium sized bowl 5” – 6” in diameter. If you are making a bowl for a hand spinner then you’d better get the dimensions from them because they spin yarn in a wide variety of lengths depending on what they are making and what they are comfortable with using.
Fiber note:
You can make a ball of yarn with your fingers and rolling the yarn from a skein into a ball. It is easier with a wooden ball winder (which you can also turn) or a mechanical one. Some knitters use more than one ball of yarn at a time. It would be better to have two separate bowls rather than trying to use one bowl to hold two balls of yarn.
Instructions on Turning the Bowl
Turning a bowl is fairly straight forward. I have instructions on turning a basic bowl here as well.
1. Attach blank to face plate
For this project I attached a blank of larch wood to a face plate using 1” wood screws. You want a good flat surface for your face plate to attach on. The screws need good wood (not soft or cracked) to get a good grip. The face plate on this bowl is attached to the top of the bowl. We will turn a tenon on the bottom to use in our turning chuck when we will hollow out the bowl.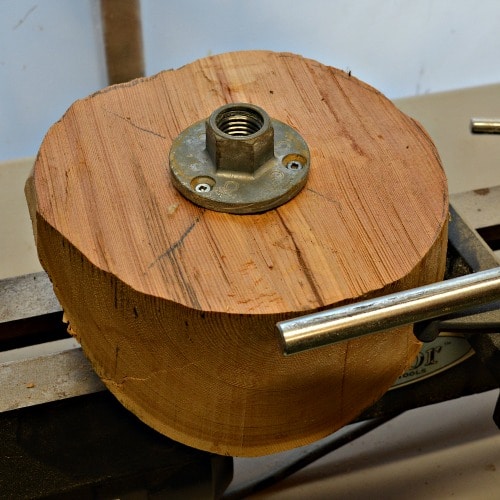
Mount the blank onto the lathe using the face plate. Rotate the wood by hand to ensure that you are not hitting your rails or your turning rest. Start on a slow speed to see how the blank is situated on the lathe. Some vibration is expected because at this stage the blank is not round and balanced on the lathe.
2. Turn the blank round
Now that you are comfortable with how the blank is rotating on the lathe use your bowl gouge to turn the blank round. You can do some rough shaping at this point but your goal is to trim off the extra wood so that your blank spins smoother on your lathe. If you want to you can increase the speed of your lathe once it the blank is turned round.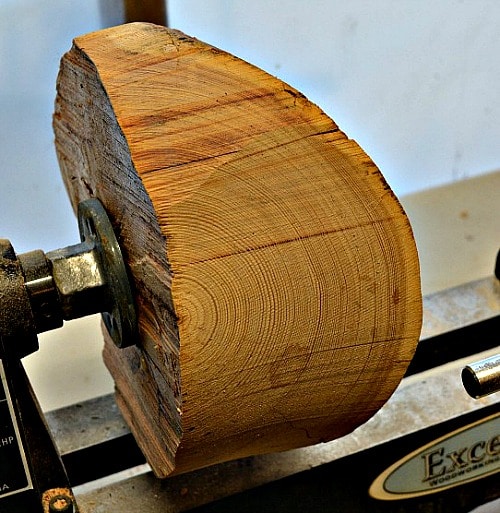
3. Shape the yarn bowl
Shape the main portion of the bowl. If you want the rim to be closed a bit, shape the edges now. Working from small diameter to large, use your bowl gouge to shape the outside of your bowl.
4. Make the tenon for the chuck
While I have this separated for instructions I usually make the tenon as I am shaping the bowl. The tenon needs to be made for your specific chuck. Measure the distance from the top of your jaws to where the wood will rest. If your distance is ½” then make your tenon just a bit smaller. If the wood from your tenon rests on the bottom of your jaws then the wood will not sit as securely in your jaws.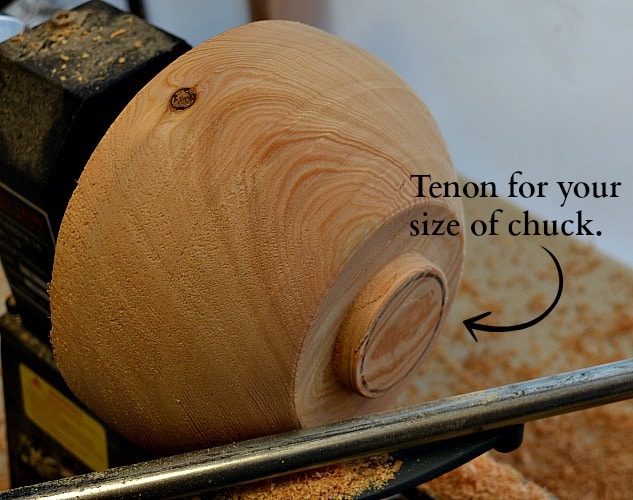
Some chucks require a slight dovetail shape. Use a straight edged scraper, or a skew chisel on edge, along with a template to help you shape your tenon. Unless there is a really really good reason, make your tenon as long as you can without bottoming out. This will give you the most secure hold on your wood.
As I was working with the larch, and thinking about making the slot for the yarn, I decided to sand and finish the outside of the bowl here where I could sand right up to the tenon. You can sand and finish the outside now or wait until the inside hollowing is done. The choice is up to you.
Remove the face plate from your bowl!
5. Attach yarn bowl to chuck
Put your chuck on the lathe. Place the bowl inside the jaws and tighten. Make sure the bottom of the bowl rests on the top of all the jaws. I tighten my chuck by alternating the holes the key is in. The grip your chuck has is a mechanical one. By using all of the access holes to tighten, you are ensuring that each jaw has equal pressure on the tenon. There is no problem with tightening the chuck as you progress through the hollowing. It is better to have a secure turning than one flying off of the lathe.
Remember to bring the tail stock up to support your blank. I find that on my first few cuts that I use a bad angle and get a catch on the wood. Having the tail stock support at the start lets you get used to the hollowing cut and adds a bit more security.
6. Hollow out the inside
This is the normal procedure for the tools that you are used to. I use my ½” bowl gauge and the hollowing goes fairly quickly. There is just a slight undercut on the lip of the bowl. This is to help the yarn stay put. The rest is straight forward hollowing, time to make some shavings!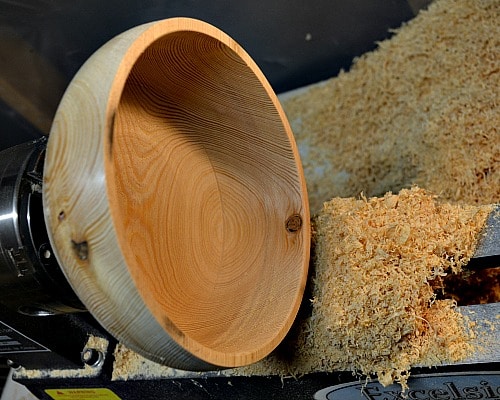
7. Sand and Finish
I completed the interior portion of the bowl and then sanded and finished with orange wood polish. Since you will have yarn in contact with the wood you want to make it smooth.
At this point I would normally have flipped the bowl around onto a jam chuck and removed the tenon. Then, while the bowl was still on the lathe, I would finish the bottom completely. This is where we make the regular bowl into a yarn bowl.
8. Design the slot for the yarn
The goal here is to keep the yarn flowing from the ball, in the bowl, to the work in process, outside the bowl. You can see the hook shape that I wanted to cut. As the yarn can slide out of the slot it will occasionally slip out, but hopefully not very often. I used a black “sharpie” to mark out the slot. I would have been better to use a soft pencil. The lines would have been thinner and a better guide for my cutting.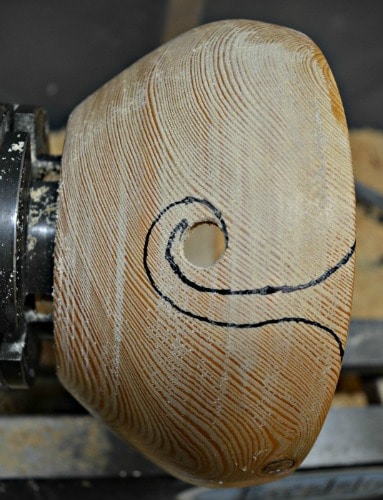
9. Cut out the slot
This is my first yarn bowl so I was not sure how I was going to hold the bowl to cut out the slot. I decided to leave the bowl on the lathe. I bought a new Makita jigsaw. My old (really old) jigsaws shook and rattled like crazy. The new jigsaw was very smooth and easy to operate. I held the bowl with one hand and very carefully cut along my markings to create the slot.
Lesson learned. Make the slot much smaller than you think it should be. While my markings looked great on the bowl, the cut slot is huge! This is where the learning part of turning comes in. Now I know what I’ll try next time.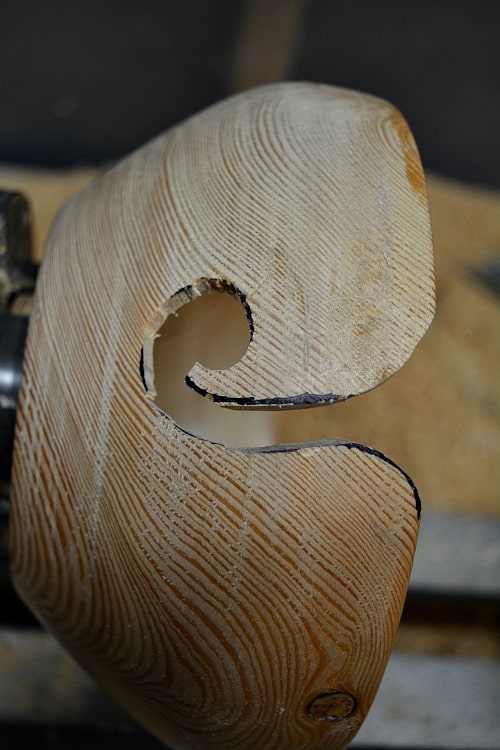
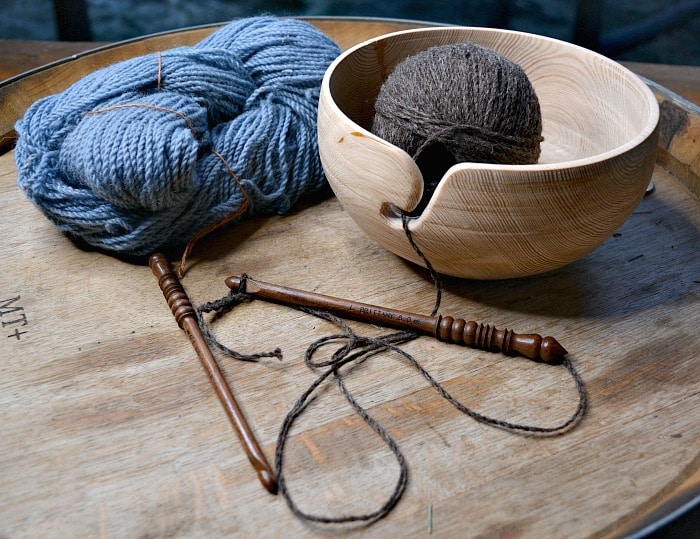
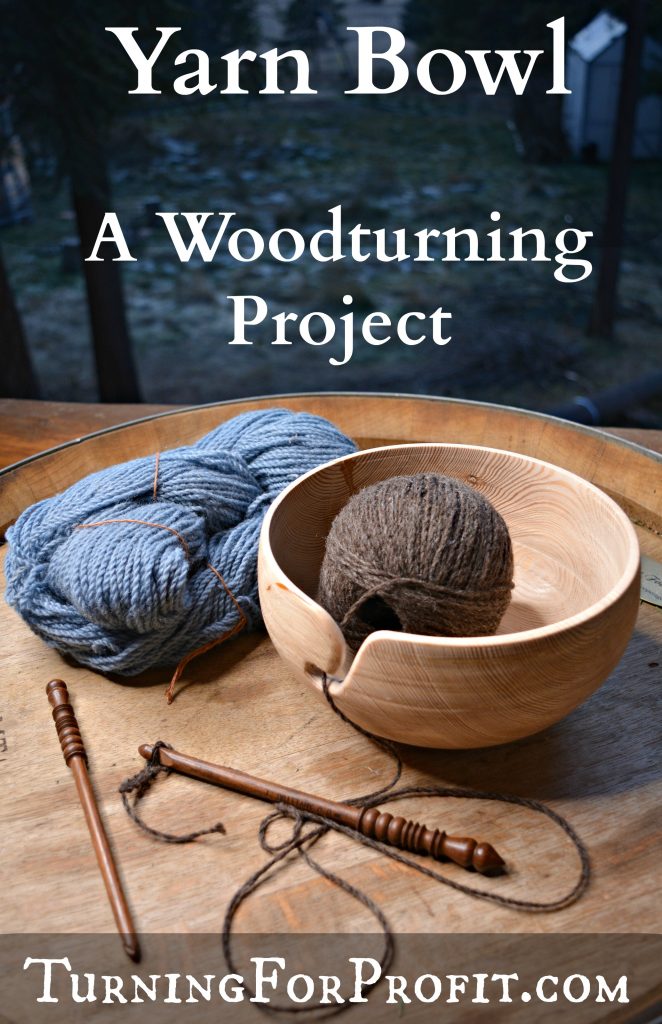
My second attempt at the yarn slot went a lot better. I picked up a dremel tool. Making sure the bit did not take too much wood was the first challenge. The slot is much smaller and a better shape (this is the bowl in the featured image at the top and the image down below). They do take a lot of sanding by hand. A Facebook post of a yarn bowl provided a time estimate by that woodturner. He said it took him about 4 hours to make a yarn bowl and he sells them for around $ 35.00. I think the pricing and or the work need to be adjusted here. What do you think?
10. Sanding and Finishing
This section took quite a bit of time. I’ve seen a few comments about turning yarn bowls that indicate the extra cutting, whittling, sanding, and final finishing really do take a lot of time. Compared to a regular bowl, which is finished completely on the lathe, a yarn bowl requires more hand work.
Overall I’m satisfied with my work. I took the tenon off by hand on the first bowl. I had two reasons for this. One I wasn’t sure how secure the bowl would be on a jam chuck with a slot going through the side of the wood. I figured that would increase its flexibility and even with the tail stock up for support I was still doubtful. The bowl is also turned out of larch. It had a large split, several cracks, and a portion broke while I was cleaning up the slot. So overall the wood was fairly brittle and that was my second reason for taking the tenon off by hand.
On the second bowl I starting the parting process with the bowl held by the chuck. I measured the bottom of the bowl and it was 3/4″ thick so that gave me room to use a thin parting tool. While I did not part it off completely while on the lathe I was able to pry the tenon off and only have a little bit of clean up work on the bottom.
Turning a Yarn Bowl
This is a very satisfying project. Taking a regular bowl and giving it a specific job as a yarn bowl increases its selling potential. While it may not be in high demand, the market of hand spinners and other fiber artists is very open to paying for a good quality yarn bowl. If you can tighten up the process and maybe increase the prices, above that mentioned in the post, then they could be a good option for your woodturning.
Here are a few other turnings you could do for those who are fiber artists. To go with the yarn bowl, turn a ball winder. Use this to take the skeins that are sold in wool shops and wind the yarn into a ball. There are also turned sett gauges, a spinning diz, needle cases, and a decorative shawl pin.
If you are interested in combining your wood turning with selling your turned products why don’t you join the Facebook group, “Woodturning Entrepreneur“. It is a great group of people who are turning all over the world and are thinking about making a little (or a lot) extra money from their passion. Remember to always turn safely.







I tried to order your “7 Skills” book – WTB042 – off the page, but it does not work for me!
I’ve tried it on two different machines and one phone. No go.
Can you send a link by email please?
Thanx!
Geo
Hi Geo. Please go to the home page. Click on “Shop” (Farthest right on the menu bar). Once this page loads click on “Get the book”. This takes you to the check out page with the book already loaded as the product you are buying. Follow the instructions to enter your coupon code. Once you have applied your coupon code then click on “click out with PayPal”. That should get you your book with the coupon discount applied. Robin