Gardening Tools: Row Markers – A Turned Garden Implement
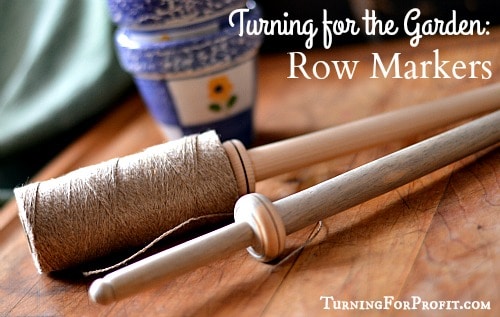
Turned gardening tools combines two great hobbies: turning and gardening. Row markers can be turned and they will make laying out your garden a breeze.
It seems so simple. Mark a row in your garden to plant the seeds in. If the row is longer than 4 feet you are going to need some help. I’ve used sticks with string, and nails with string, and long boards that move as you are making your furrow. Sticks and nails do work to hold the string in place but how do you store them afterwards?
You can turn wooden row markers. Attach the string to the markers and mark the ends of your row. When you are finished wrap the string on one of your markers, store it with the rest of your gardening tools, and you’re ready for the next gardening challenge. If you want to be ready for the farmer’s markets when the ground is getting warm then this post is for you.
Row Markers Design Considerations
There are actually two types of row markers. The one we are turning helps you “mark” out your rows nice and straight. The other “marks” what you’ve planted in the ground. You need both kinds of markers in your garden.
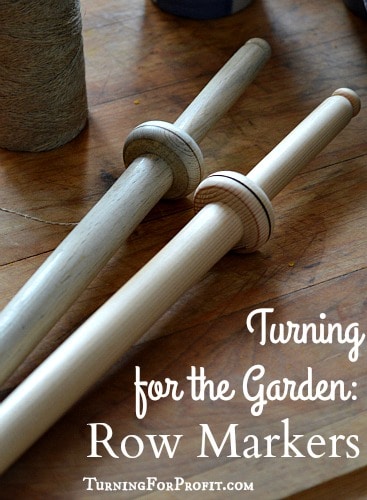
A Row Marker is a pointed stick that goes easily into the ground. It is long enough not to pull out sideways so it holds the string tight. There is a whorl for the string to rest on. Two markers are needed to mark the ends of your rows.
The wand (this goes into the ground) should be strong so I’ve turned it from 3/4 inch at the whorl down to about 3/8ths of an inch at the point. You shouldn’t need a sharper point as it is likely to break off. The ground should be fairly soft as it is prepared for the seeds. The whorl in the middle is to support the string and to prevent you sticking the marker too far into the ground. The handle is turned about 1/2 inch in diameter so a spool of string, or a center pull ball, can be placed on the top of the marker. This allows the string to unwind as you mark out the row. Remember to come back to the first marker and make the string tight.
How to turn Row Markers
A Row Marker is a between centers project. This is a tool to be used so imperfections with the turning are not so significant especially if you are turning one for yourself. This is a good project for improving your skills turning thinner shapes. I used a parting tool, a skew chisel, a roughing gouge, and a spindle gouge. There is no set way to turn a row marker so use the tools that you are familiar with and have fun with the project.
The piece of wood should be about 12 to 15 inches long and at least 1 ½ inches in diameter. So a 2 x 4 ripped lengthways in half would give you two turning blanks for this project. Check your blanks for knots. One of my blanks had a 3 inch section at the end with several knots. So my markers are on the small side just over 12 inches. If there are knots in the handle or wand your row marker could break. Use wood that is clear of big knots.
-
Turn the blank round between centers.
Put a drive spur in your head stock, and a live center in your tail stock, and then mount your blank between them. On this project I did everything between centers. The parting tool allows me to get very close to the drive spur or the live center. This extra room makes it easier to use the roughing gouge. I will use a roughing out gouge for most of the wood removal in this project.
-
Plan the Row Marker
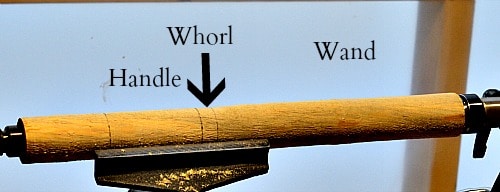
To make it easier to part the row marker off of the lathe I leave about a 3/8ths inch space as waste wood at each end. The handle end is about 3 inches long. This will be turned down to about 1/2 inch. The whorl is a decorative shape in the middle and should be a reasonable size. In my case I’ve made it very close to the maximum diameter of my stock. The remaining portion is the wand of the row marker. These dimensions are marked out on the round stock.
-
Shape each portion on the Row Marker
I defined the whorl first with my spindle gouge. I then cut a small groove in the whorl and used wire and friction to make a burn mark on the whorl.
(Place the wire under the blank, then with the wire held with both hands lift the wire up until it is resting in the groove. To make it burn you will have to pull the wire up so that the friction of the wood heats the wire hot enough to burn the wood. This is an easy way to add a decorative touch to your turnings.)
Using the roughing out gouge I worked down to the basic shape of the wand. Work on getting a smooth taper at this point before you are trying to be really smooth. Still with the roughing gouge I reduced the handle to just larger than 1/2 inch.
-
Final shaping and smoothing of the Row Marker
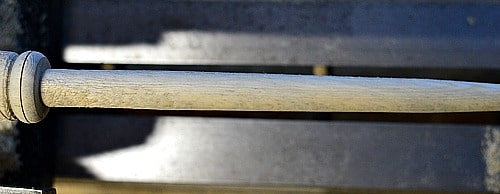
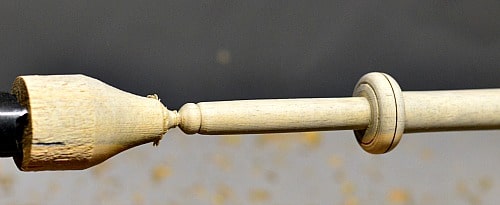
I used a skew chisel to take very light cuts on the wand. To see how it was shaping up I looked down on the row marker so I could line up the shape with the bed of the lathe. While the bed is out of focus you can see the taper on the wand.
I used the skew to smooth the sides of the whorl and finish off the handle as well. I typically still had a few rough or bumpy areas left.
-
Sand the Row Marker on the lathe
Depending on how well it went with your skew chisel and your shaping you can start with a finer grit of sand paper. However, if you don’t like the feel of your handle or the tool portion then use a coarse grit like 80 or 120 to quickly smooth out those challenges. Move on to 220, 320, 400, 600, and 800 grit sanding. Remember to wipe the row marker down with a paper towel or soft cloth between each grit. (I like the feel of the extra fine grits but as this will be used in the garden you could stop much earlier.)
When the sanding is completed, finish the row marker with carnauba wax.
-
Part the Row Marker off of the lathe
I use my spindle gouge to shape the ends of the row marker. I got down to about 1/8th inch on the wand then did the final shaping on the handle and parted it off of the lather. Remember to do the final cutting with one hand so the other hand is available to catch the row marker as it is parted off of the lathe.
-
Sand off the bottom and top of the Row Marker
You are almost done. Sand the top and bottom portions, going through the grits in progression as you did in Step 5. Remember the wax as well.
-
Repeat to turn the second Row Marker
Use your first row marker as a guide to layout the second marker. They don’t have to be identical but you probably want the general shape to be fairly close. Have fun with your turning.
Selling Row Markers
If you are going to sell your row markers then you want to set a higher level of quality. Yes row markers are gardening tools, but if you are going to sell them you want to present a good finished product. Make sure the tool is smooth and the decorations either match or are obviously different. You might want to sand to a finer grit to make the row markers smoother to the touch. If you do apply finish to your row markers make sure the finish is non-toxic as it will be used in the garden.
You are selling wooden gardening tools and the initial purchase will depend on how attractive the product is to your customer. A smooth touch and a great visual presentation will make your products more attractive. Often the wood will sell itself.
You can be creative and turn garden dibblers that are similar in style on the handle and then sell them with the row markers as a set. You may want to sell some string to go along with your markers. You could package different lengths (5’, 10’, 15’, 20’, and so on) of string in sandwich bags. Then you could sell it separately or include it with the row markers as you decide.
If you are selling at the farmers’ market here’s two blog posts to help you. What you should do (Mastering the craft show) and what you shouldn’t do (seven mistakes to avoid). You might find that your friends at the farmer’s market who are selling bedding plants would be willing to sell them on a commission basis. This would let you sell your product without having to set up a display.
Let me know how you make out. I would love to see what you have turned.
Thanks, Robin.








[…] and/or instructions. You might want a spare key just in case you get busy in the garden with your row markers and dibblers and you get locked out of the […]