Welcome to the wonderful world of woodturning. If you are not sure what you need then this post will help you understand woodturning and the related woodturning equipment. At this point I need to make some simplifying assumptions.
First you will need a powered lathe. The lathes come in a range of sizes from mini to full-size but it is powered by a motor to spin the wood for your turning. Secondly you are just starting out and have not yet determined a specific niche for your turning. That is, if you just want to turn large bowls then you are looking for a specialized lathe with unique characteristics. A basic woodturning lathe will spin the wood from the back to the front of the lathe by going over the top. This direction is needed so that the tools on the tool rest will cut the wood properly.
Basic lathe set up
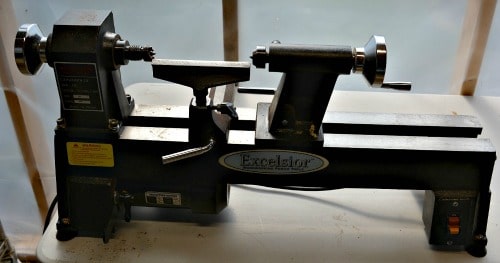
First let’s get comfortable with the parts of the lathe. All lathes, from the mini above to a full sized lathe will have these components. The head stock is on the left. This is the power of our lathe and will make the wood spin. Inside the drive shaft of the head stock is a drive center.
On the right side of the lathe is the tail stock. It can be moved along the bed of the lathe to accommodate different lengths of wood. The live center is placed in the tail stock and spins as the wood is rotating.
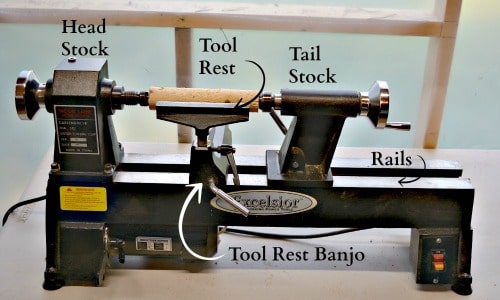
At the center of the lathe is the tool rest with the tool rest banjo. The banjo is the part that holds the tool rest and has a lever so that you can adjust the position of the tool rest on the lathe.
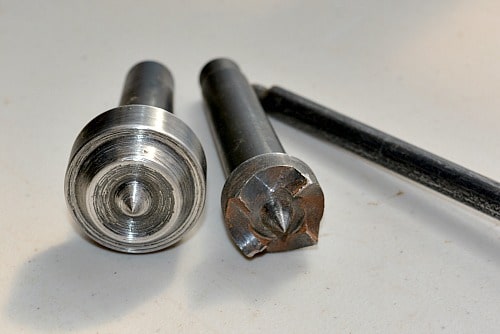
Live center and Drive center
The live center is on the left. This center spins as the wood is turned on the lathe. The drive center is on the right and has drive spurs on it to bite into the wood and make it turn on the lathe. To the far right is the knock out bar which is used to remove the drive center from the head stock or the live center from the tail stock.
These centers will have a Morse taper that describes the shape behind the head. Make sure the Morse taper (MT) of your centers match the Morse taper of your head and tail stock. In this case everything is a #2 MT.
This is the primary set up for a lathe. The purpose is to adjust to the size and shape of the wood you are turning then hold that wood securely as you shape the wood with your tools. You will need to maintain your lathe and make sure that it is easy to adjust and use. Here is how to maintain your lathe.
Two kinds of turning
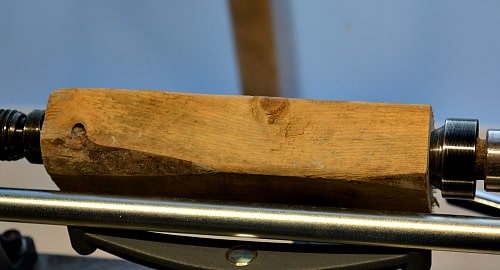
When you put the turning blank on the lathe and the grain of the wood is parallel to the bed of the lathe then you are doing spindle turning. Your drive spur makes the wood spin and the live center helps to hold it on the lathe.
When the grain of the turning blank is at right angles to the lathe then you are doing faceplate or bowl turning. There are different ways to hold your bowl blank on the lathe but one of the easiest is to mount your turning blank to a faceplate that is then threaded onto your drive shaft. The face plate is attached to the turning blank with wood screws. 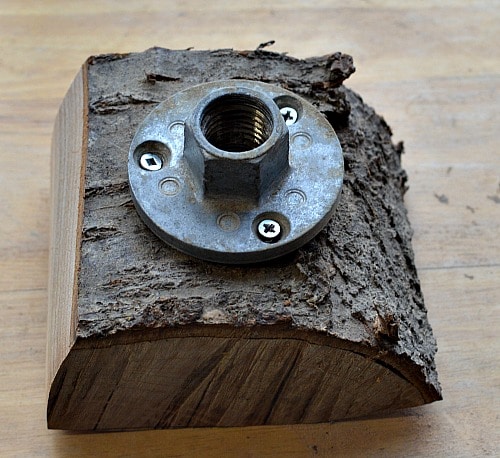
You screw the faceplate onto your head stock so that when the drive shaft spins the face plate and blank turn as well.
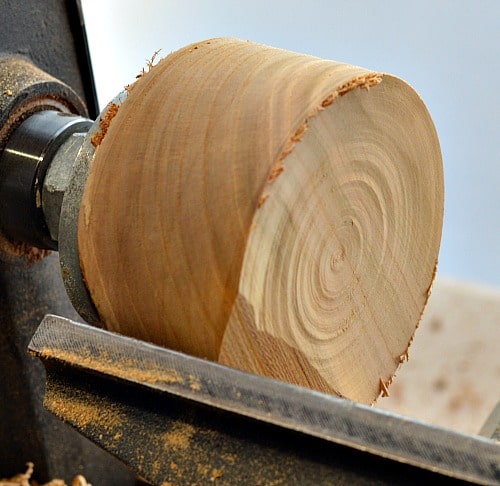
Your tools are designed to work best with either spindle or bowl turning projects. That’s what we will look at next.
What tools will you need?
For spindle turning you start with a roughing gouge, and then you can use a spindle gouge or a skew chisel for your detail work.
A spindle gouge is used by a lot of turners as the main detail gouge. It is shaped like a smaller version of the roughing gouge but you want a different shaped grind to let you do detail work.
A skew chisel can be a bit of a challenge to learn, but once you are used to it, you can get a really nice smooth surface and it is a very versatile tool.
For bowl turning you will use your bowl gouge. The wood grain is spinning perpendicular (right angles) to the lathe and requires a bowl gouge for smooth cuts. Do not use your roughing gouge to turn wood with this orientation.
In addition you will need a parting tool to separate your wood off of the lathe.
Let’s take a closer look at the turning tools.
Common Turning Tools:
- Spindle roughing gouge
- Bowl gouge
- Spindle gouge
- Skew chisel
- Parting tool

Spindle roughing gouge
The spindle roughing gouge is your work horse for turning your wooden blanks round. It is usually the first tool that you will use on your spindle turning. More information is here How to use your Spindle Roughing gouge.

Bowl (Top) and Spindle (bottom) gouges
These two gouges help you shape your work. The bowl gouge (Top) is designed for faceplate or bowl turning. Use this gouge whenever the grain is at right angles to the lathe.
The spindle gouge is shaped to cut when spindle turning. The wood grain is running parallel to the lathe.
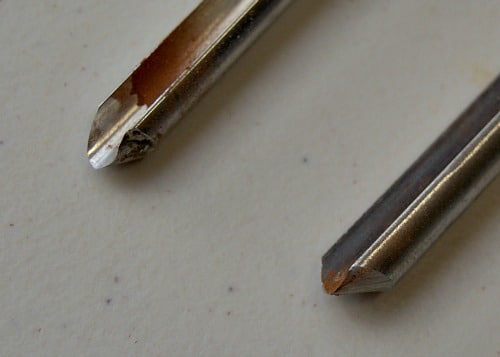
The bowl gouge (Top / Left) has a deeper flute to help the shavings leave the inside of a bowl. The spindle gouge (Bottom / Right) has a shallow flute. Both gouges have the top corners of their flute ground away so that you can present the tool to the wood without catching on the tips. Take a close look at the roughing gouge and you will see almost a right angle at the tips.
Many turners have different shapes and grinds on their tools. If you are learning on your own then you need to grind away the tips of the gouge and then shape the tip and see how it turns. Over time you will find what works for you and that is how you should grind your gouges.
Skew chisel

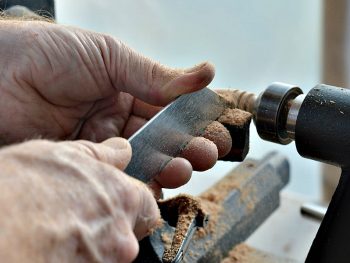
A skew chisel is similar to a bench chisel. However you can see that the grind is at an angle.
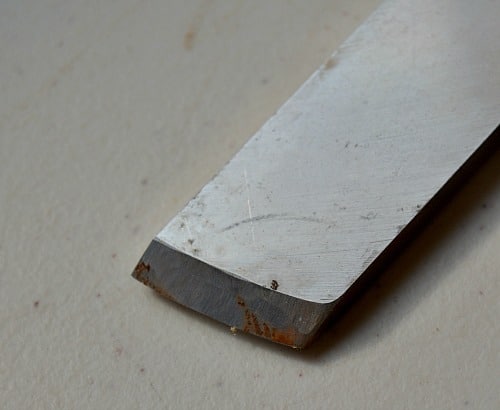
The skew chisel is ground from both sides to the middle. This is similar to an axe. The grind allows you to cut from both sides of your tool rather than just one side like a bench chisel. Try to get a uniform grind on each side. They do not have to be mirror images of each other but you want a nice smooth finish.
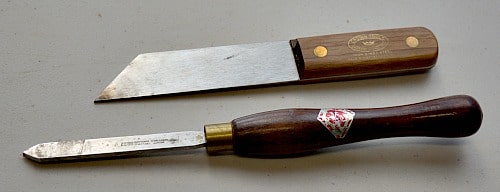
Parting tools
These are the two parting tools that I use. The top one is a narrow parting tool 1/16” wide. The extra depth of the blade gives it more strength.
The bottom parting tool is 1/8” wide. The diamond or pointed shape allows you to part in either orientation. The parting tool cuts right at the tip so the rest of the metal does the support work.
Additional lathe tools
- Multi Jawed Chuck
- Collet Chuck
You do not need these tools immediately. However they are very useful. The Multi-jawed chuck will give you more options to hold the wood firmly on the lathe with a lot of flexibility. The collet chuck can be used in the head stock to hold small pieces of wood. When used in the tail stock the collet chuck and a drill bit turn your lathe into a horizontal drill press. This can be very useful.
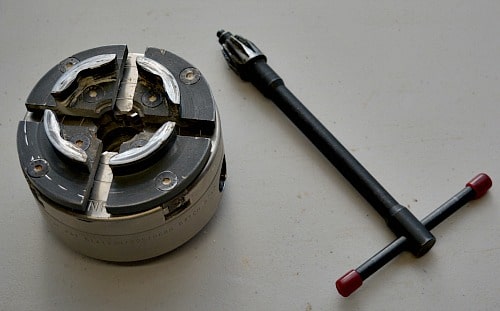
4 Jaw Chuck or Multi Jaw Chuck
This is designed to hold wood on your lathe. The chuck screws on to your drive shaft and you use the key to enlarge and contract the jaws. You need to get the right size chuck to fit on your lathe. My drive shaft is 1” in diameter with 8 TPI (threads per inch). This is a common size for wood lathes.
Collet chuck
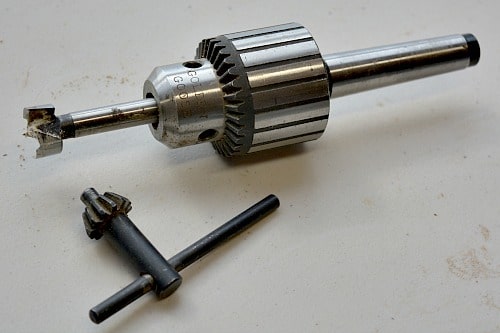
This chuck holds drill bits in its jaws. The back end of the chuck slides into your tail stock. There are three sizes of Morse Taper (MT). You want the taper on the chuck to match the taper of your tail stock. This is a #2 MT.
General woodworking tools
These are general woodworking tools that will help you with your turning projects. Please follow the safety instructions that are provided with each tool.
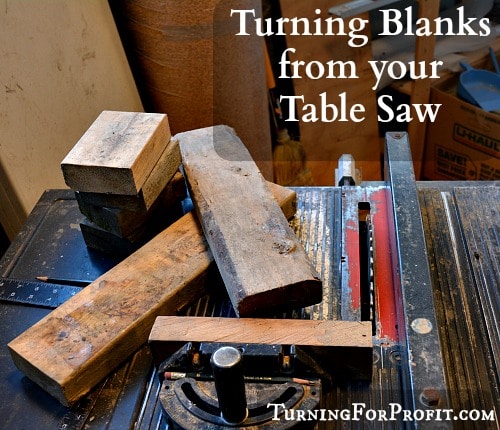
- Table saw – cutting turning blanks
- Band Saw – making and trimming bowl blanks
- Drill Press – holes in turning blanks for pens and other kits
- Dovetail Saw – finish parting wood off the lathe
- straight edge – finding the center of spindle blanks
- sharp pencil – good clean markings
- small carving gouge or utility knife – clean up after the parting tool
- Wood Working Awl – marking the center point on turning blanks
The wood working awl is used to mark the center of your spindle turning blanks. If you do not have an awl you can sharpen a point on an old screwdriver whose end has worn out.
General Instruction
Spinning wood at any speed can be dangerous. Always wear eye protection and dust protection. If you have a manual for your lathe, and any other power tools you choose to use, be sure to read the manual first and follow all of the recommended safety precautions.
If at any time a suggested procedure does not feel safe to you then stop. Evaluate what you are doing and see if there is a safer way to perform the cut or operation. Try a different tool or angle of approach on your cut.
You should also stop and rest if you are tired or under the influence of drugs or alcohol. Make sure you are clear headed and thinking about the turning that you are performing. Even though these projects do not involve large turning blanks they can still injure and hurt you if they fly off of the lathe and hit you.
Anytime you hear a sound from your lathe that doesn’t sound familiar, stop the lathe and make sure your turning is still attached securely. Tighten the tail stock, and any chuck you are using. You want that wood to stay on the lathe. Inspect the turning blank and make sure there are no cracks or splintered pieces of wood either.
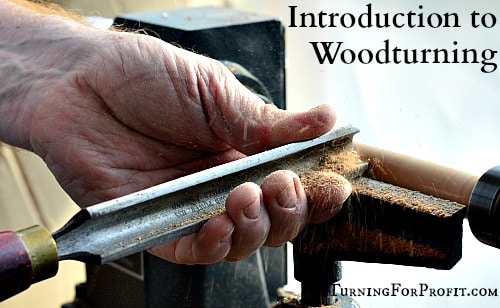
Have fun at your lathe. Turning wood is a great way to spend your time and the results make great gifts or even items for personal use. Now you need some wood and to get that on your lathe. Here’s how to do that.
If you are new to woodturning here is a book, Woodturning Blueprint, to help you learn how to turn. There are seven projects in the book that help you progress in your turning skills. In addition there are tips and discussion on how to develop the business aspect of your woodturning hobby. More information on Woodturning Blueprint is available here.
Turning For Profit
If you have any questions about turning, or the business of turning, please leave me a comment at the bottom of the page.
These posts are for you, the woodturner. If you like turning projects or articles related to the business of turning then please sign up for the Turning For Profit newsletter. Generally it comes out once a week and has links to the current articles, a bit on what I am up to, and usually a question for your response. You can sign up on the right side bar or just a little lower on the page.
I love wood turning and sharing with you. You can follow me on Facebook as well. Thank you for joining me on this woodturning journey. Have fun and remember to turn safely.









Great article for a newbie like me. Thank you. Please add me to your newsletter list