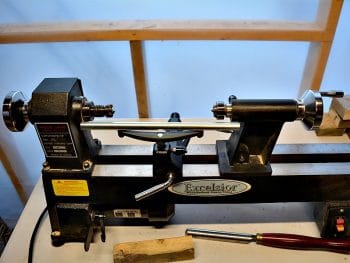
When you have just acquired your first lathe the number of accessory selections can be overwhelming. All you want to do is turn some wood. For many of the posts on this blog, I use a multi-jawed chuck. While this chuck is convenient it is not necessary for your turning. Most lathes come with a small faceplate. We will look at turning between centers and how to use a faceplate when mounting wood on your lathe.
Here are two ways you can turn without using a multi-jawed chuck.
Turn completely between centers
When you are turning a spindle on the lathe it is held between the drive spur (in the headstock) and your live center (in the tailstock). Turn most of your project leaving a joint at both ends of your work. This will give strength to your turning and it will be less likely to snap as you are working on it. I would sand and finish the body of your turning then proceed to shape the two ends.
How big of a joint do you need?
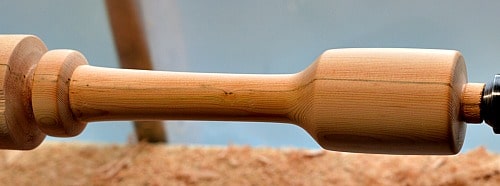
That depends on the size of your turning. Here are two examples:
A Kraut Pounder is used to mash cabbage to make Sauerkraut. It is a good weight. This means that you need a good joint on each end of your work to keep it connected to the lathe. If you turn the joint too small the torque of cutting the spindle could cause the wood to be thrown from the lathe. You can see in the image how large I’ve left the wood at the tailstock end.
Only after you have shaped and sanded your project should you cut away the excess wood.

With a spurtle, the wood is much thinner and lighter. There is not as much mass spinning on the lathe so you can have a smaller amount of wood supporting your spindle as you turn. With small work, like the spurtle, I would part all the way through the wood on one of the ends. I would cut one-handed so the other hand can catch the turning as it falls away from the lathe.
Which end should you part off?
This process is actually fairly straightforward. It depends on how you want to finish the ends of your spindle and how confident you are in your turning. If you want a clean and crisp point on your work then that should be done while the lathe is spinning. This is the end to part off.
If the end is going to be smooth and round then you can trim with a knife and smooth with sandpaper. Turn the wood as small as you are comfortable without parting through. Then part the other end to the shape you want and clean up the rounded end.
The spurtle is a good example. The stirring end is rounded and smooth to stir the porridge. This is the end to clean up with a knife and sandpaper.
The handle end is decorative and would look nice with a clean and centred point. This is the place to part the turning off of the lathe. The Kraut pounder was rounded on both ends so I turned the wood quite small then removed the wood from the lathe to complete. I did not try to part through on that project. The wood is too large and heavy.
The main point here is that you will have to finish off both ends. If you could hold the spindle by one end then you can finish the unsupported end and do the final shaping and sanding while it is still on the lathe.
Use a faceplate when mounting wood
You can turn a jam chuck to hold the wood on the lathe. The process is:
- attach scrap wood to the faceplate
- turn the face of the wood flat
- drill a hole into the wood for a tenon
- insert the tenon on the turning blank
- use the tailstock to support your work
- remove your tailstock and finish that part
- part of the turning at the headstock end
I will turn a honey dipper to show you these steps.
Attach scrap wood to the faceplate
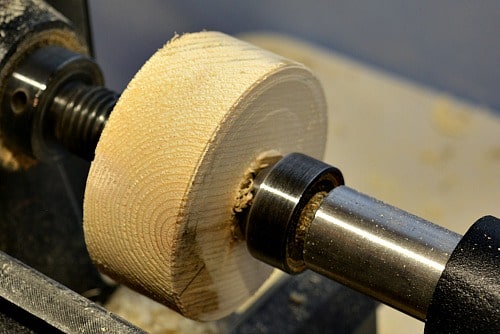
I have prepared a 2×4 to be the scrap wood.
Center the face plate on the wood and attach with wood screws.
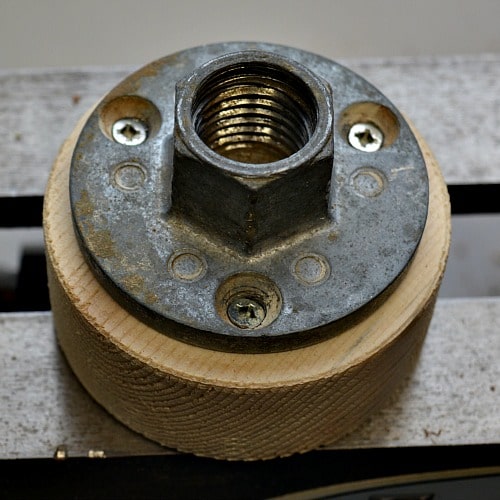
Turn the face flat
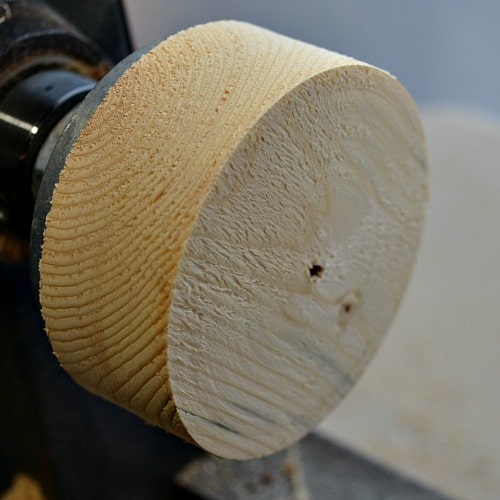
Mount the faceplate on your lathe and flatten the surface. This does not have to be perfectly flat but you do want the tenon on your turning blank to sit smoothly in the hole.
Drill a hole in the faceplate blank for the tenon
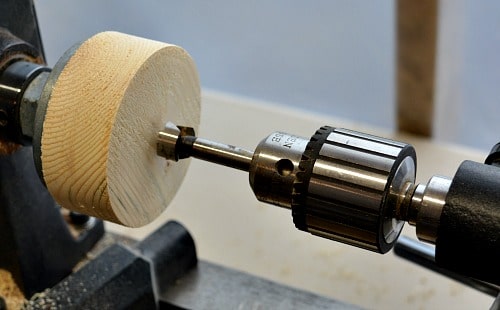
The honey dipper blank has a 3/4″ tenon so that is the size of the hole drilled into the wood.
I used a Forstner drill bit in my tailstock to do the hole. If the connection is loose use a paper towel around the tenon to increase the tightness of the fit. The tenon should be tapered slightly to ensure a good fit when you are mounting the wood on the lathe.
Insert the tenon
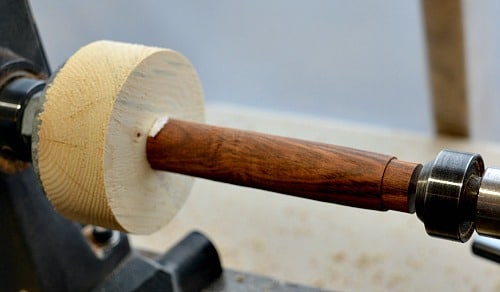
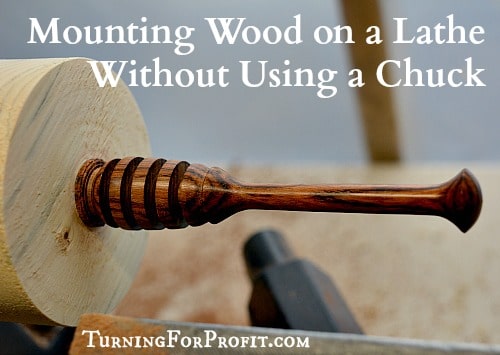
Insert the tenon on the honey dipper blank into the hole so that it is secure. This is how you mount the wood on your lathe.
You can bring the tailstock up and use it as a press to increase your security.
Tailstock supports the work
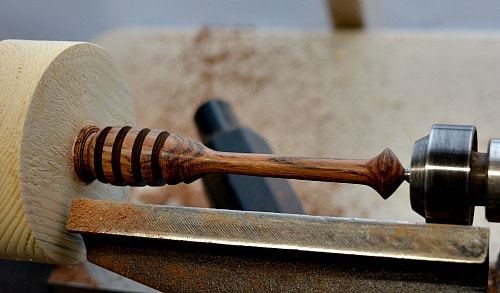
Cutting the blank even 4 or 5 inches from the faceplate is a lot of sideways pressure on the blank. Therefore always bring your tailstock to support your turning.
At this point complete most of the turning on your honey dipper or other projects.
Remove the tailstock
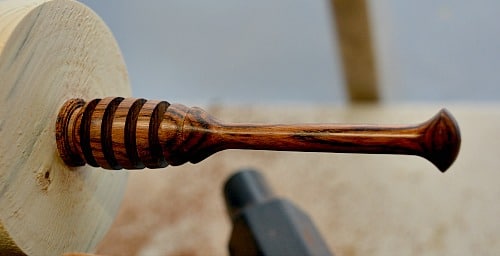
Now to finish the far end of the blank you can remove the tailstock. Depending on how secure the blank is being held by the faceplate you may want to use your non-tool hand to support the turning as you make your final, light cuts.
Don’t forget to sand and finish the end as well.
Part off the turning
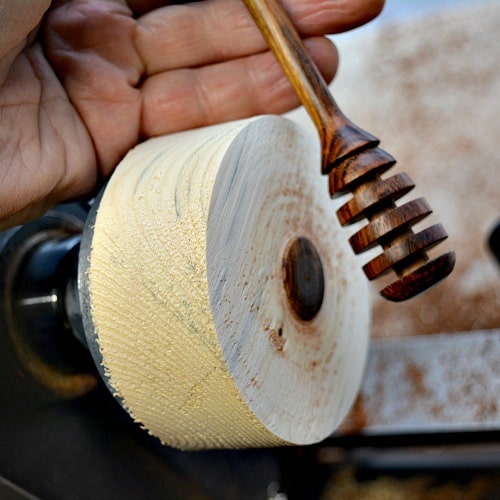
Now switch to the headstock end and part your turning off of the lathe. Again use your non-tool hand to catch the turning as it comes off the lathe.
Finish the honey dipper with sanding and finishing just like you did the rest of the turning.
Tips on using the faceplate
Mark on the face of your wood where the screws are located. You don’t want to accidentally run into the screws with your turning tools. You can enlarge the holes to accommodate larger tenons. If you have a series of miscellaneous blanks with slightly different tenons then organize them going from smallest to largest. You can use a bowl gouge or scraper to slowly increase the diameter of your hole.
If you have a thick blank on the faceplate then you can turn the faces smooth when the tenon is too large and start over again. The wood from the 2×4 is just under 1.5” thick. The screws go in for about 3/4″ so the full face is available and then can be turned again at half the thickness.
The depth of the hole would depend on the heaviness of your turning. If you are turning small items like a honey dipper then 1/2″ would be deep enough. A ball winder or a garden dibbler should be about 3/4″ in depth. Be on the safe side until you are used to the process.
You need a very snug fit as there is no method to tighten the wood once the hole is made. While a paper towel will help, always use the tailstock for support until you are doing the last final cut.
Multi-Jawed Chucks
A multi-jawed chuck is extremely handy to have at the lathe. A chuck makes it so much easier mounting wood on the lathe. However, they are an expensive accessory to add to your lathe. I have a one-way talon chuck and it currently costs $ 235 when you include the insert necessary to mount it on an 8tpi lathe. This is almost as much as my mini-lathe which was $ 300. Now the lathe was on sale and I’ve never seen chucks go on sale!
So having a multi-jawed chuck is not essential to your woodturning. However, if you are serious about production work and turning efficiently then eventually you will want to purchase a chuck. Peter Child, from the UK, has an article on the different types of chucks you can use, “All about Woodturning Chucks”.
I purchased the one-way talon chuck because it was a good weight and had a good range for the jaw positions. I have also used a Nova chuck at a woodworking class. The Nova chuck was smaller than my one-way chuck and I had to keep turning smaller tenons to make it work. The biggest frustration for me, mounting wood, was that the two chucks open and close in opposite directions. That is not a problem with the chucks, just the turner!
Turning For Profit
If you have any questions about turning or the business of turning, please leave me a comment at the bottom of the page.
These technique posts are for you, the woodturner. If you also like turning projects or articles related to the business of turning then please sign up for the Turning For Profit newsletter. Generally, it comes out once a week and has links to the current articles, a bit on what I am up to, and usually a question for your response. You can sign up on the right sidebar or just a little lower on the page.
I love woodturning and sharing with you. You can follow me on Facebook as well. Thank you for allowing me to join you on this woodturning journey. Have fun and remember to turn safely.





Great article, Robin, thanks very much. Turned a small oak box using your method but with a bit of hot glue for extra security.
Excellent site…….very inspiring for a beginner wood turner thanks again.
Hi Robin,
I have zero lathe experience, but a great desire to learn. Where should I start?
I am being gifted a lathe. A friend bought one, but never used it, he now wants to bless me.
I have been carving spoons by hand and am self taught. I am looking for a creative outlet, you see I am the mother of eight (one homemade and seven adopted).
Besides praying myself a mentor, what is the best and safest way to learn the lathe?
Thank you!
Kimmie
Hi Kimmie,
Thanks for your comment. I just wrote a book called “Woodturning Blueprint” that takes a beginner through 7 projects so that they understand how to use a lathe and improve their skills as they progress through the projects. You also have all the projects on this web site. There are posts on making turning blanks from a table saw, and how to use your roughing gouge which will help you get started as well. I would encourage you to join our related Facebook group, “Woodturning Entrepreneur“. There are members from all over the world and you could find a mentor through them. I’m glad you are willing to take up the challenge of woodturning. After raising 8 children this should be a lot easier!
Robin