Different projects require different approaches to sanding. With an emphasis on shop safety, this article will give you four techniques of sanding to take your turnings to the finish line. No need to take your turning off the lathe to sand. When sanding on the lathe you just keep the lathe running. You sand on the lathe using the spin of the lathe to rotate the object over the sand paper you are holding. Make sure you are wearing a dusk mask. It can be a real pleasure to sand your turning when you know the right technique.
Here are the tips to help your sanding go more smoothly. ☺
Before you begin – Organize
Organize your sandpaper in order of grit starting with the coarsest which is the lowest number. I start with 80 grit if I have rough wood or shaping that I want to do. Start with a higher grit if you have a good surface to start with. Then progress through the grits: 120, 150, 220, 320, 400, 600, 800. Increase the grit by no more than 50% over the last grit that you used. You don’t want to jump up too fast, as you need to remove the scratches of the last grit with the next sheet of sand paper. Many books recommend sanding only up to 320 or 400 grit. Consider the end use of the product. Many of the turnings I produce are for yarn and fiber and need to be extra smooth hence the additional finer grits of sand paper.
I cut my sanding sheets into quarters then fold them in half. This is a good size to hold with enough surface area to sand well on the lathe. Move the tool rest to the side. Increase the lathe speed to a level you are comfortable with. Move your hand over the lathe and approach the turning from behind. If you have a catch with the sand paper the rotation of the lathe will just lift your hand up rather than spinning your hand down and catching between the product and the lathe bed or tool rest. I’ve done that and it hurts.
1. Technique: Spindles
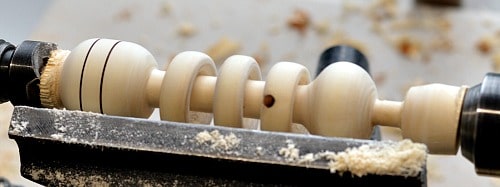
You don’t have to push hard, just move the sand paper back and forth over your turning. Use the fold in the paper to sand tight spots such as coves or embellishments. Once you have smoothed the turning with the lower grits you can progress rapidly through the remainder. One trick that I do is to wipe the turning down with a soft cloth or paper towel after each grit of sand paper. I do this with the lathe still turning. This is to remove any large pieces of grit from the paper on your turning that might scratch your work as you continue sanding. As the piece is turning you can’t see the details of individual scratches. Stop the lathe after two or three sanding to ensure that the turning is progressing nicely.
Working with spindles, boxes or bowls often requires sanding at different times. I make crochet hooks. Turning the body I use a chuck holding the wood and the tail centre also supporting it. Once the body is finished I part off the tip and sand this as well. Finally I part off the crochet hook at the handle and manually sand and finish that part. Keeping the sandpaper in order makes the sanding go faster.
2. Technique: Bowls
You can use the spindle sanding technique with bowls, too, except that you should be sanding on the bottom left quadrant of the bowl. Again a catch will cause your hand to move out and away from you. This is less likely to twist your fingers. Remember to keep the tool rest well away from the turning when you are sanding. I know this is inconvenient when you want to grab a scrapper to touch up an undulation on the bowl but safety is important. When sanding a bowl reduce the rotational speed of your lathe.
With larger bowls, you may want a soft sanding pad to hold the sand paper. With the larger surface area, it takes longer to sand to a smooth finish and the surface will heat up uncomfortably if you just use the sand paper with your bare hand. A sanding pad reduces the wear and tear on your hands.
3. Technique: Small Hollow Turnings
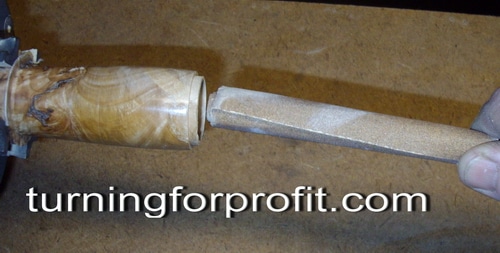
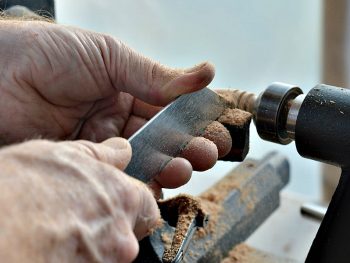
Turning small boxes or needle cases where the inside is visible and touchable requires careful sanding. Even though you might fit a finger in, don’t use your hand or fingers. Don’t insert your fingers until the lathe has stopped spinning. The sand paper can become caught in the turning and twist your fingers mightily. Instead wrap the sand paper over a small sized gouge, like a ½” spindle gouge. Wrap the paper so that the rotation of the lathe keeps the paper wrapped on the gouge. You can see the edge of the sand paper coming over the gouge on the first image.
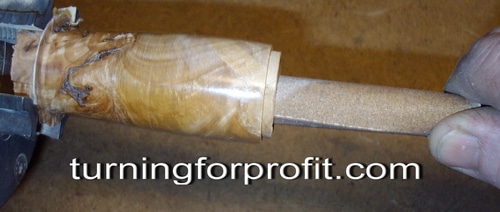
Extend the sand paper over the end of the gouge so the tip doesn’t accidentally mar your turning. Hold the sandpaper with your fingers so you can insert the gouge into the turning and keep your fingers far away.
4. Technique: Captive Rings
Captive rings are turned on the lathe, out of the blank that the main object is turned from, and can’t be taken off without breaking them. You can use a captive ring tool, spindle gouge, or a skew chisel to turn the ring. Work the ring from both sides until there is a very thin portion of wood holding the ring to the turning. If you cut the ring away from the turning you will have to sand it by hand so stopping sooner is much better than stopping later.
Once the ring is the correct shape apply the sand paper gently to the ring and work through all of the grits. Make sure it is safe for your fingers as you progress down the sides of the ring. If I have to wrap the sandpaper on a gouge or a dowel to reach the ring I sand at the front of the lathe rather than the back. The rotation of the turning at the front of the lathe will push the sand paper down and towards you. Again sand with light pressure so you don’t break the ring. Once the ring has been separated from the turning you will have to clean it up with a small sharp knife or chisel then sand by hand. To sand the underlying turning hold the ring to one side and then the other. Rings can be produced on goblets, baby rattles, pens and other spindle turnings.
Using some of these sanding techniques will ensure that your hands are always safe and your turnings are smooth and ready for final finishing.
Over to You
What’s your best secret for sanding your turnings? Where would you improve on my techniques. Leave a comment.
Other resources:
Great Wood Finishes
MICRO MESH SOFT TOUCH SANDING PADS
BOWL SANDER KIT COMBINATION By Peachtree Woodworking – PW25
WoodRiver Turners Sanding Pack Sandpaper








[…] amount of undulation and careful sanding will work. When I was just learning to turn, and using sanding to smooth out my rough cuts with a spindle gouge, I found that heavy sanding with 80 grit sandpaper […]