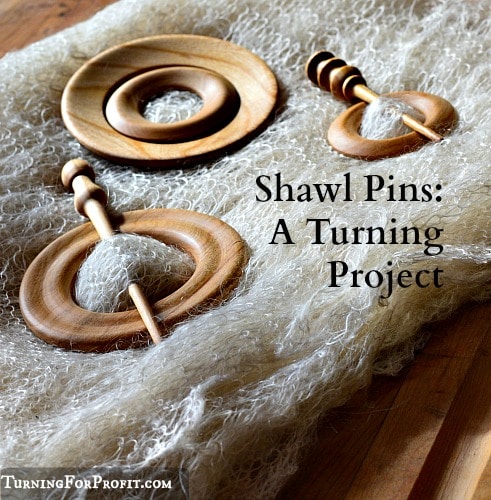
Wooden shawl pins are a beautiful accessory to handmade shawls. You use the ring and the pin to interlock the overlapping section of the shawl. This keeps the shawl in place and the wearer is not only warm but can show off your turning work as well.
Two sizes of shawl pins are turned in this project. Depending on the way the shawl was created, that is, knitted, crocheted, or woven, and whether the creator used bulky, or fine yarn, you will need either a large or a small shawl pin. Lace weight shawls work beautifully with the small shawl pin. Bulky yarn shawls will need the larger pins to be secure.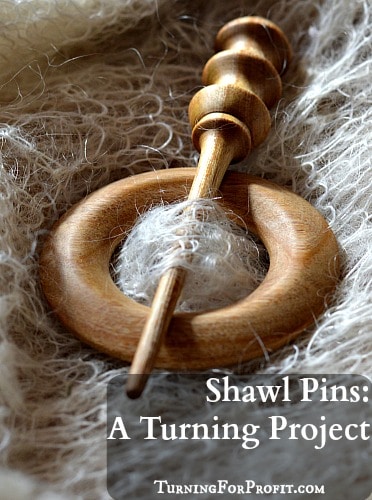
Besides holding the shawl in place the shawl pins reflect your own creative taste in the style and design of the ring and the pin. This is a two part project requiring both spindle turning and bowl turning techniques to complete.
Design Consideration
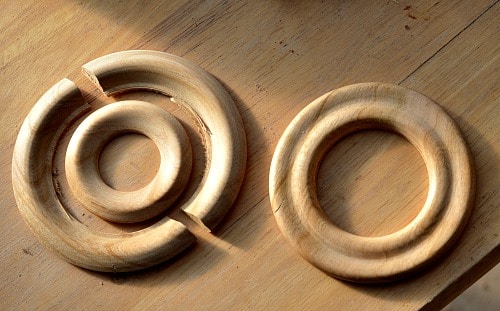
The ring should be turned out of a close grained hard wood. This is because the ring will have two weak points (opposite each other) where the grain will be short and not as strong. You can see where the ring broke in the image below. The thickness of the ring should be fairly thin. These rings are about 1/4″ thick and made out of cherry wood.
The pin needs to be close grained as well because of how thin the pin is. While I turned the pins down to about 1/8” you could be a little finer yet if you wanted to. I have turned the length of the pins just a bit longer than the diameter of the rings. This should give enough length to keep the shawl, pin, and ring together.
For shawl pins, you need to be careful with the finishing. I sanded progressively from 220 to 800 grit (220, 320, 400, 600, and 800). Remember to wipe your work down with a soft cloth every time you change your sandpaper grit size. Shawl pins need to be extra smooth so that they don’t catch the fiber of the shawl.
As there is a fashion statement in the shawl pins let your creative side have free reign. When I’ve looked at jewelry and necklaces recently it runs all the way from delicate and tiny, to bold and large (with lots in between too). So try lots of styles, curves, angular etc. You may be surprised at what sells and what doesn’t.
Turning the Rings
Turn the rings by first turning the face flat. Then determine the size of your ring. Turn the center portion deeper than the thickness of your ring. Shape and sand the ring. Part the ring off of the lathe.
Select your piece of hardwood. For this project I am using cherry. Orient the grain in the blank so that it will be at right angles to the lathe bed. This will give you the strongest rings.
Make sure your wood is secure. For this project I am using a face plate that is screwed into the blank with three wood screws. Remember how big your screws are so you don’t accidentally hit them with your turning tools.
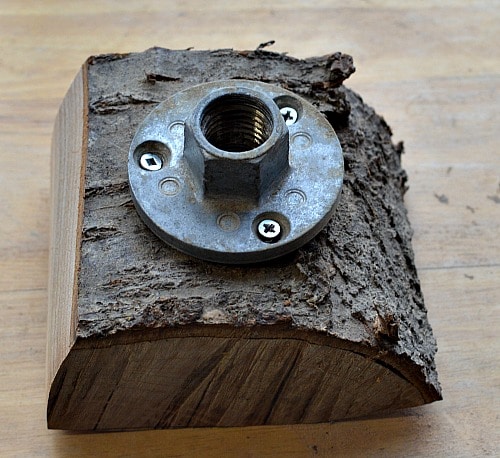
My blank was a bit rough and ready. I took my time and carefully turned the blank round on the lathe.
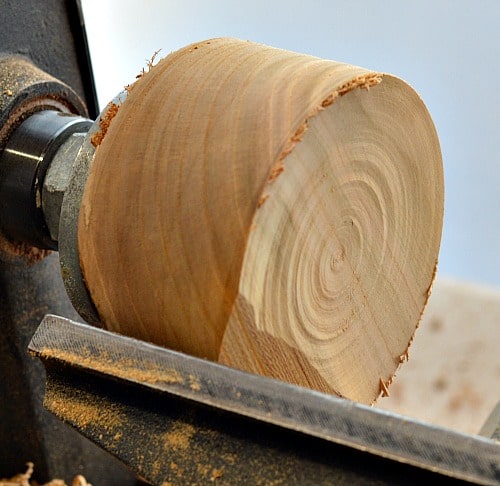
Once the blank is ready determine the diameter of your ring, how wide the ring will be and the rough depth of the ring as well. My first ring was just over 3” in diameter and 3/4″ thick. When working on the face and inside of the rings, turn your tool rest at 90 degrees so that it is in front of your turning blank. The tool rest should be just below center when using the bowl gouge and just above center if you are using a scrapper.
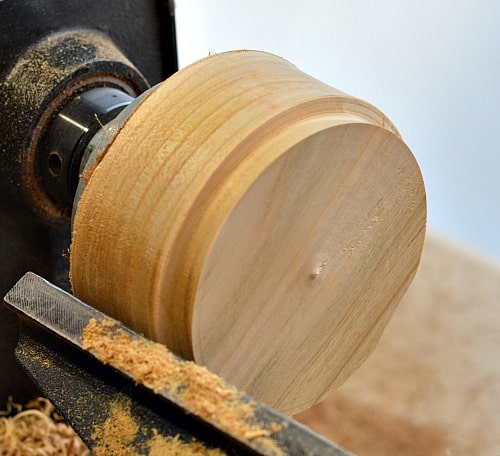
Turn the center portion first just like turning out the inside of a bowl. I used a bowl gouge to turn the ring. If you are not comfortable turning the face like I did then use a parting tool like a scraper. Make sure the tool is cutting above center so that any catches move the tool down and into thin air.
Then shape the outside of the ring. Once you have a good shape then sand the ring while still on the lathe.
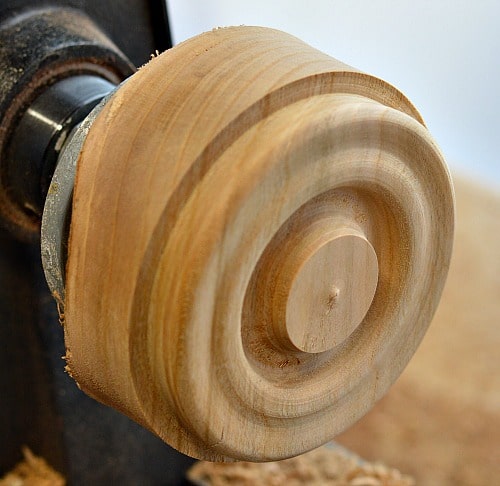
Using a thin parting tool you can now part the ring off of the lathe. To prevent burn marks on your wood part a groove that is just a bit wider than the parting tool blade. Remember to hold your other hand to catch the ring as it comes off of the lathe.
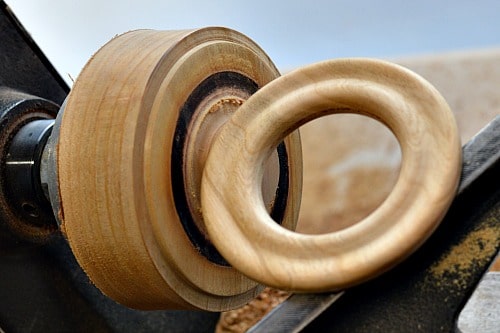
The back of the ring comes off of the lathe fairly rough as you are using a parting tool to separate it. This requires hand sanding through all of the grits to get a good result.
Warning
When you turn rings on the lathe part them off so that the ring will fall away from the tool. On one of my larger rings I parted the back of the ring past the point where it should have separated from the lathe. I had not progressed far enough with the center hole and the ring did not separate. I switched to the front of the blank and “carefully” went deeper in the center. The ring separated from the lathe but because my turning tool was going through the center of the ring, the ring snapped in two. Always go deeper on the center portion then part the ring off the lathe from the back side of the ring.
Turning the Shawl Pins
The shawl pins are a between center project. To give the best support, when turning a very narrow spindle, keep the tail stock supporting the work for as long as possible in the turning process. This keeps the thin pin from bending and moving all over the place. So the very last step, before parting off, was to shape the point of the pin. On the cherry pin there was significant vibration of the pin that would have made it very difficult to turn if it hadn’t been supported by the tail stock.
I prepared four birch blanks and one cherry blank for the pins. As the blanks were basically square I drew a line from corner to corner then used an awl to mark the center point. There were some cracks in the birch blanks so I moved the center point over, away from the split. As the pins are very narrow in diameter there was no difficulty in turning an adequate pin.
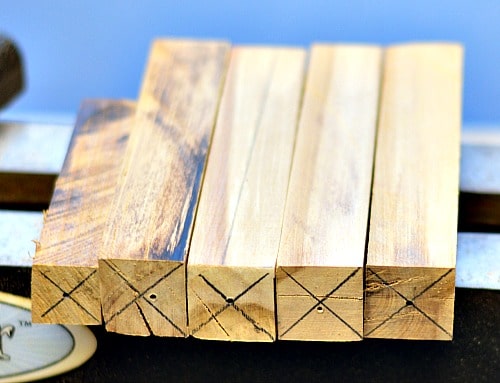
Mount the blanks between your drive spur and your live center. Turn the blank round and use a parting tool to shape a tenon to hold the blank in your multi-jawed chuck in the next step.
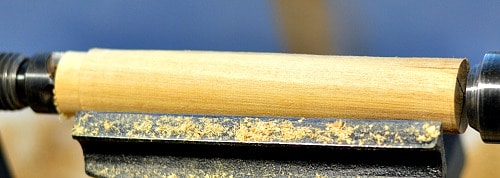
I like to mark out the size of each segment on a spindle project. The top of the pin is decorative. The actual pin is thin and straight and a challenge to turn.
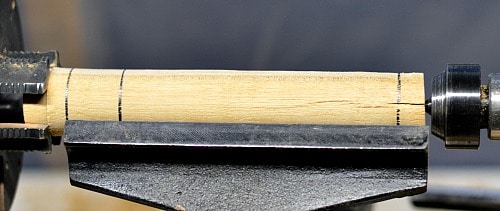
With the shawl pins I turned the blank down to below 1/2″ diameter along the length of the pin. I used a spindle gouge for the shaping of the shawl pin.

The next step follows the same procedure that I used in turning icicles. You start near the tail stock. Take light cuts with the force of your tool moving along the wood towards the tail stock. As you make the pin narrow you then move toward the head stock and repeat the process. This gives you the most support for your cuts and a very nice thin pin as a result.
You may have some imperfections along the shaft of your pin. Don’t worry about these, that is what the sanding is for!
Once the shaft of the pin is as thin as you want then you can shape the top of the pin.

With the top shaped and sanded you can now part off the tip of the pin.

Use your sand paper to finish the shaping of the point.
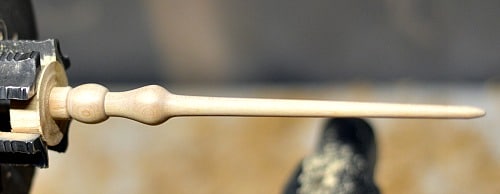

Your final step is to part the pin off of the lathe. Remember to sand the top of the pin just like the body.
Production options
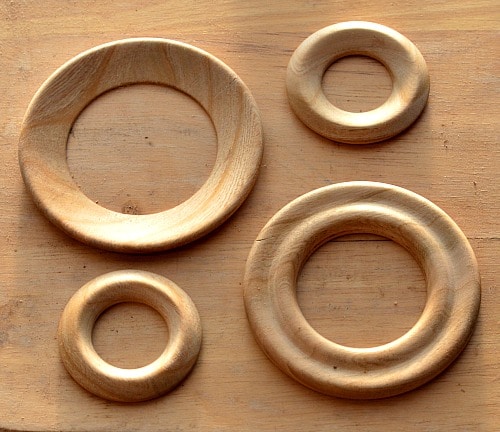
You can do shawl pins in a production fashion by turning off several rings. While doing this project I turned large rings then small rings. As you can see in the bottom image the small ring fits inside the larger one. The one cherry blank could have given me six rings at one go.
There is not as much flexibility with the shawl pin itself. Turning several blanks round, with the tenon as well, can go quite quickly. However each pin needs to be in the multi-jawed chuck on its own. The pins are fairly small and really don’t take up that much time for turning.
The pins can be turned from pen blanks. This can give you some extra design features depending on the nature of the grain patterns in your pen blanks. You could also select contrasting woods for the rings and the pins.
Marketing / Business implications
Shawl pins make great gifts especially if you have friends who make handmade shawls. Unless you are selling shawls in your stall it is more difficult to sell them on their own. Putting the pin on a shawl immediately shows how they are used and displays the beauty of the wood.
These would be perfect to add to a fiber arts booth, or a clothing store, as consignment items. Making a fashion statement with wood requires some ingenuity on your part. Small squares of knitted fabric could be used or you might want to put a shawl on a hanger and show your collection of shawl pins that way.
Depending on the wood you use and the amount of detail you add to the work you would have a middle to low end price point for your products. Remember if you have to pay $ 5.00 for an ebony turning blank then the price of the shawl pin has to reflect the cost of the blank and your time for the turning.
I hope you have had fun with this project. Turning rings on the lathe was fun and I enjoyed seeing how thin I could turn the shaft of the pin as well. You can turn other fiber related products like a ball winder, sett gauge, or a needle case.
If you would like to receive regular notice of the projects on this page please sign up for my email newsletter. It will let you know once a week what new posts have been added to the web site. You can also follow me on Facebook or Pinterest if you would like.





Robindl, boa tarde. Estou lendo seus escritos e conselhos sobre como trabalhar com torno mecânico para madeira.
Pois bem, também sou designer de móveis em escala e meu dilema é saber qual é o torno ideal para pequenos trabalhos em madeira.
Quando fabrico um móvel que tem colunas no seu interior fico limitado pois tinha um pequeno torno austríaco que acabei vendendo quando vim para Brasil.
Hoje estou com ideia de adquirir um mas desconheço marcas e preços. Poderia me aconselhar? Vi o que está usando nas suas fotos, gostei dele é penso que poderia ser o que estou procurando. Poderia me assessorar ao respeito? Muito obrigado e fico aguardando sua resposta.
Hi Rodolfo, If you are looking for a mini-lathe then read my article on choosing a mini-lathe. To get a better idea on the lathe that I purchased you can read the article on unpacking the mini-lathe. The excelsior mini-lathe that I bought was also on sale at the time. The products that are available in Brazil could be quite different than North America. Look for a good quality and well built lathe that won’t cost you too much money. I hope this helps you. Happy turning.