Are you looking for easy woodturning projects? As a kid I spent hours doing spool knitting with a homemade knitting Nancy. At one point I was making a rug from the cord. It sure took a long time to make it. A knitting Nancy is a small hand held tool that enables one to knit a cord. It is a block of wood with a hole in the center and four nails on the end. The quickest way used to be to snitch an empty wooden spool from your Mom and put four nails in it!
This is an easy woodturning project to turn and a great way to practice your between center turning. Two other projects that are slightly smaller in size but still fun to turn are Wooden Icicle Ornaments and Wooden Honey dippers.
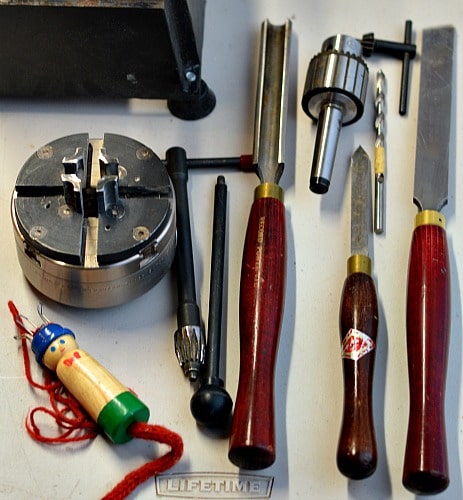
I used only three turning tools, a roughing gouge, parting tool and a skew chisel. I also used a multi jawed chuck, a collet chuck to hold a drill bit to make the center hole. I also used a drill press to drill the holes for the nails to go into. Using small pieces of wood from the shop, or even small branches, makes a wooden knitting Nancy inexpensive to produce. I used a prepared 1 ½” square blank made out of a two by four cut off.
Knitting Nancy Design Considerations
The primary concern is making the knitting Nancy easy to fit in your hand. The first one I made was a replica wooden spool. I did a test run with a bit of yarn and found the spool a little small for my older hands. The snowman would be easier for me to use. Any handle shape would work. You want to make it easy to hold but not too bulky. Experiment with different designs. As you are turning the body on the lathe you can grasp it with your hand to see how it fits.
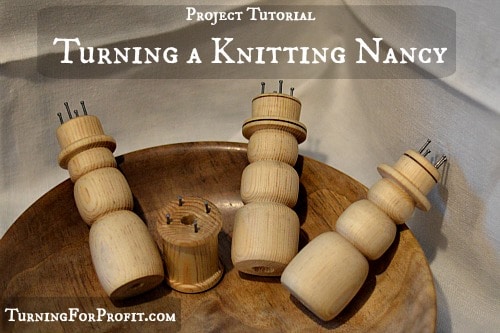
A knitting Nancy makes a great gift so I did three snowmen and a spool as my examples. Just like real snowmen no two are quite the same. Other shapes work as well so let your creativity flow. I turned the replica spool first then turned three snowmen. So my pictures show both types in progress. Here is a link to “The Lost Art of Knitting Nancies” for more ideas.
Knitting Nancy Turning Process
-
Turn the blank round between centers
Put a drive spur in your head stock, and a live center in your tail stock, and then mount your blank between them. I used a roughing out gouge to turn the blank round.
-
Space out the length you want
I had a prototype to give me a rough idea as to the size. I spaced out three sections to be snowmen and a shorter one at the end. I used a parting tool to create a tenon on each knitting Nancy. Then I carefully parted the blank in the center.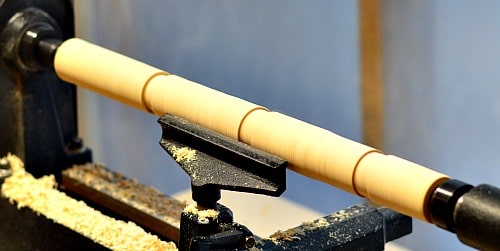
-
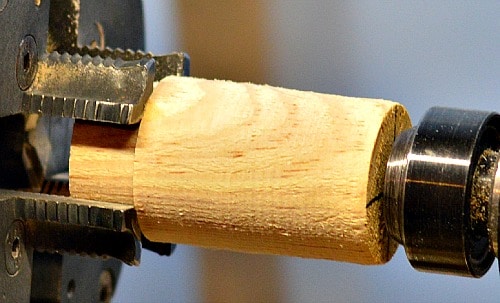
Set up the blank in a multi jawed chuck
Remove the drive spur and mount your multi jawed chuck on the lathe. Use the tail stock to center and hold the blank in place as you tighten your chuck. I then parted off the individual blanks. You could also cut the blank on a band saw as well. As I use a skew chisel to part the knitting Nancy off of the lathe, I turn away a portion of the top near the head stock, with a parting tool, so that I have enough room to angle the skew chisel in later.
-
Drill the hole
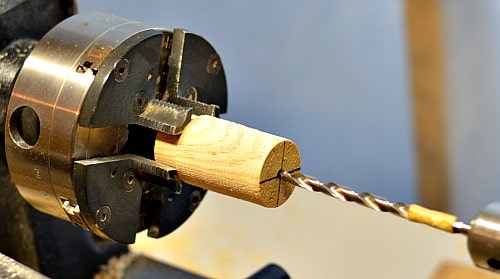
Insert a collet chuck in your tail stock. I had a 7mm pen turning drill bit. This was a good size for fine yarn and was long enough to go completely through one of the snowmen. To use the drill bit on the lathe tighten the drill bit in the collet chuck. Then move the tail stock with the quill completely retracted up to the base of the turning. Then expand the quill on your tail stock so that the drill enters your wood. (Yes the lathe has to be turned on for this to work) Depending on the length that your quill extends you may need to extend and retract the quill, move the tail stock / repeat until the hole is completed. This was quick and easy for the spool but longer for the snowmen.
I used a larger diameter drill for two of the snowmen. In this case I could only go about 3 inches into the knitting Nancy before my drill bit bottomed out. As I was turning away the top part of the knitting Nancy to make the top hat I reversed the blank in my multi-jawed chuck. I used the point of the drill bit to get the blank centered then continued drilling in from the opposite end. Take your time and you should get a hole straight through your project. As the yarn is flexible it does not have to be perfectly aligned. I then reversed the blank again and used the drill bit to assist getting the blank back on center.
-
Shape the body of the knitting Nancy
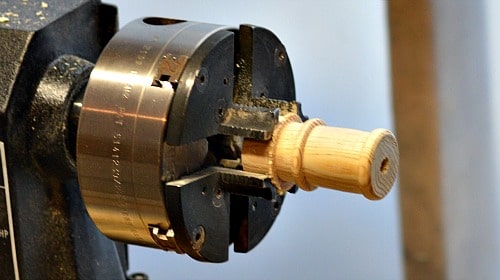
The spool required two beads (top and bottom) with a flat section in between.
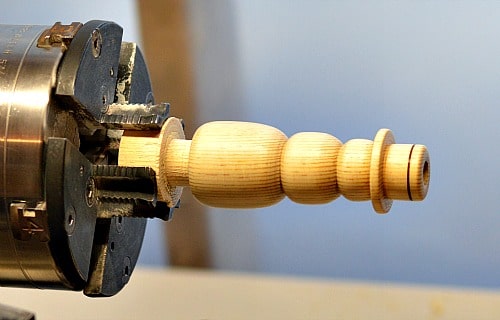
For my snowmen I turned the top end first and shaped the top hat. Then I used a parting tool to get a rough size for the body segments of the snowman. I used a skew chisel for the detailed work. Finally I shaped the initial portion of the bottom with a parting tool and skew chisel. Don’t part the knitting Nancy off just yet.
-
Sand the knitting Nancy on the lathe
Depending on how well it went with your skew chisel and your shaping you can start with a finer grit of sand paper. However, if you don’t like the feel of your spool, top hat, or body segments a coarse grit like 80 or 120 will quickly smooth out those challenges. Move on to 220, 320, 400, 600, and 800 grit sanding. Remember to wipe the project down with a paper towel or soft cloth between each grit. As the knitting Nancy might be used by younger children I used a food safe wood polish.
-
Part the knitting Nancy off of the lathe
I use my skew chisel to do the final shaping of the bottom as I part the knitting Nancy off of the lathe. This gives me a smooth finish. If you make the bottom slightly concave then the knitting Nancy can stand up when not in use. Use your free hand to “catch” the project as it drops off of the lathe.
-
Clean and smooth the center hole
Take a small round file to clean and sand the center hole of the knitting Nancy. I used the sharpening file from my chain saw. Make this reasonably smooth as this is where the cord is going to go and you don’t want any rough spots to snag the yarn.
-
Sand off the bottom of the knitting Nancy
You are almost done. Sand the bottom going through the grits in progression you did in Step 6 and apply your finish here as well.
-
Drill the nail holes
I used a center punch to mark spots for each of the nails. While getting the four nails in the right position looks better the knitting is flexible and the nails don’t have to be exactly at 90 degrees from each other.
Find a drill bit that matches the size of the nails you are going to use. I used 1 inch finishing nails that were a bit smaller than my 1/16th inch drill bit. Small cotter pins could be used as well. If the fit is too loose then use epoxy to hold the nails in place. I had the nails extend about 3/8ths of an inch.
To ensure a common depth for each nail I adjusted the drill press. Extend the drill press as low as it can go. Put the drill table at about the right height. Place the knitting Nancy on the drill press table. Rotate the drill press to its greatest depth and adjust the table to the correct height. You can see how the drill bit and the knitting Nancy compare in the next image.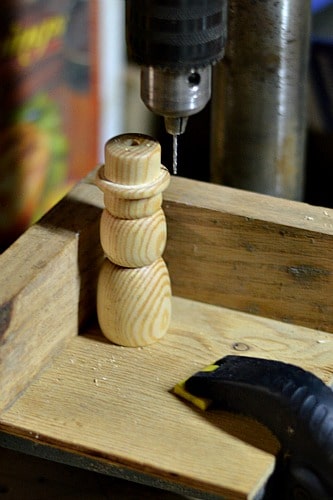
Once you have the right height, drill the four holes into the knitting Nancy. Speaking from experience it was much easier to fully extend the drill press than to precisely drill down to the depth individually. Insert the nails and you are finished. (I found that my nails varied in length so pick out four nails of the same length for each knitting Nancy.)
So that is how I turned a spool knitting Nancy. A great little woodturning project that gets easier each time you turn a new one. Let me know how you make out. I would love to see any woodturning projects that you have made.
Other Woodturning Projects you might like:
Here’s a project that is great for children. Its a brain teaser called “The Tower of Hanoi”.
Other between center projects:
For the kitchen, turning wooden spurtles for cooking oatmeal, and turning a wooden honey dipper.
For Christmas, turning wooden icicles.






Hi Robin, this is Marian from Australia, I am a collector of all types of knitting spools – vintage, modern, handmade, and artist made. Thankyou for your interesting post re turning knitting nancies. My dear hubby has turned a few for me, as well as Francois – a great wood turner in France, and another from England who made several of the “Spears Games” vintage knitting nancies. I have a blog too – spoolknitter – which I have not updated for some time due to illness, however, I hope to be able to get back to it soon.
I also am the moderator for the Flickr spool knitter group where you will also see a great variety of spool knitters from members worldwide. My own collection numbers in the hundreds, it is so easy to amass a collection! ….. cheers, Marian